
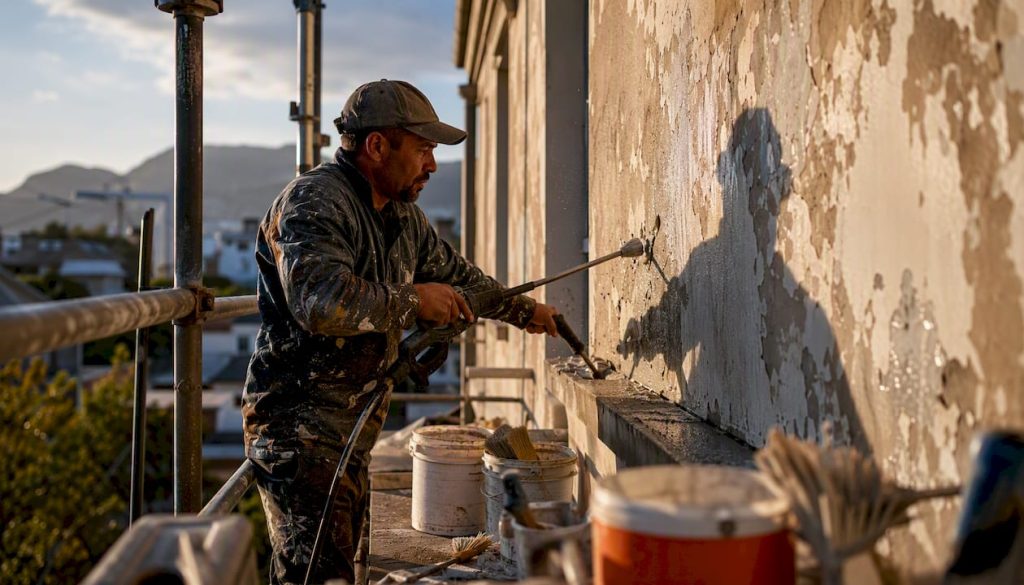
Hire a professional and request a fully specified system in writing. That means a documented surface survey, a primer matched to your substrate, and a UV-stable topcoat chemistry such as a PVDF/fluoropolymer (Kynar-based) or UV-stable polyurethane, with dry film thickness (DFT) targets and accelerated weathering evidence attached. Before signing anything, your quote should confirm:
- Written substrate assessment and condition report
- Surface preparation standard (SSPC or ISO level specified, not just “clean and sand”)
- Primer product name, chemistry, and DFT target
- Topcoat chemistry: PVDF/fluoropolymer or UV-stable polyurethane, with PVDF resin solids percentage stated for Kynar-based systems
- Accelerated weathering test reference (ASTM G154 or ASTM D4587) with hours tested
- Colour-fade limit (Delta E per ASTM D2244) and chalking limit (ASTM D4214)
- Applicator qualification or manufacturer certification
- Written warranty covering film integrity and colour retention, with voiding conditions stated
- Manufacturer field service availability for complex systems
Capeapexpainters applies this specification approach across Cape Town, the Cape Winelands, and the Overberg, with in-house crews and documented prep at every stage.
Key takeaways
Professional UV-resistant exterior coatings require a documented system specification, verified surface preparation, and a certified applicator to deliver the service life the chemistry is capable of.
| Point | Details |
|---|---|
| Demand a written spec | Require primer name, topcoat chemistry, DFT targets, and ASTM weathering references before signing. |
| Prep drives longevity | Up to 80% of coating failures trace to inadequate surface preparation; require SSPC/ISO standard and salt testing. |
| Match chemistry to exposure | PVDF/Kynar systems (35–70% resin solids) for colour-critical facades; high-solids PU for metal and concrete. |
| Insist on a sample patch | A cross-hatch adhesion test on a cured sample patch is the only reliable pre-application quality check. |
| Capeapexpainters | Offers preparation-first, in-house exterior coating services across Cape Town, the Cape Winelands, and the Overberg. |
Table of Contents
- Why UV-resistant exterior coatings fail without proper preparation
- What are the main UV-resistant coating chemistries to specify?
- Surface preparation: what to verify before a single coat goes on
- How to choose the right coating system for each substrate
- What should the written specification and warranty include?
- What should a professional quote include, and what drives the cost?
- Contractor vetting checklist: questions and red flags
- Inspection and maintenance plan to extend service life
- How do you evaluate contractor qualifications for UV-resistant systems?
- Common scams and pitfalls when hiring for UV-resistant coatings
- What does professional UV-resistant painting typically cost?
- What is the typical timeline for a UV-resistant painting project?
- What the best UV-resistant exterior work actually looks like in practice
- Capeapexpainters: preparation-first exterior coatings for Cape properties
- Sources
Why UV-resistant exterior coatings fail without proper preparation
Sherwin-Williams documents that up to 80% of all coating failures trace directly to inadequate surface preparation. Not the wrong paint. Not bad weather. Poor prep. That single figure reframes every conversation you have with a contractor.
In Cape Town and the Winelands, the exposure stack is severe: intense UV radiation, coastal salt aerosol, high humidity, and thermal cycling that expands and contracts substrates daily. Each stressor attacks a different weakness. UV degrades binders and causes chalking and colour shift. Salt penetrates micro-cracks and drives corrosion under the film. Thermal movement opens adhesion failures at edges and fixings. A coating system that ignores any one of these factors will fail early, regardless of how good the topcoat chemistry is.
The costs of under-specifying are concrete:
- Early repainting sooner than expected with quality products
- Substrate repairs (rust, rot, spalled concrete) that cost far more than the paint job
- Voided manufacturer warranty if prep or primer requirements were not followed
- Lost rental income or deferred sales during emergency remediation
Coastal sites in South Africa specifically need salt-tolerant primers and moisture-resistant finishes, while inland sites prioritise UV resistance and flexibility for thermal movement.
What are the main UV-resistant coating chemistries to specify?
Four chemistries dominate professional exterior UV protection work. Each has a different performance ceiling, cost point, and application requirement.
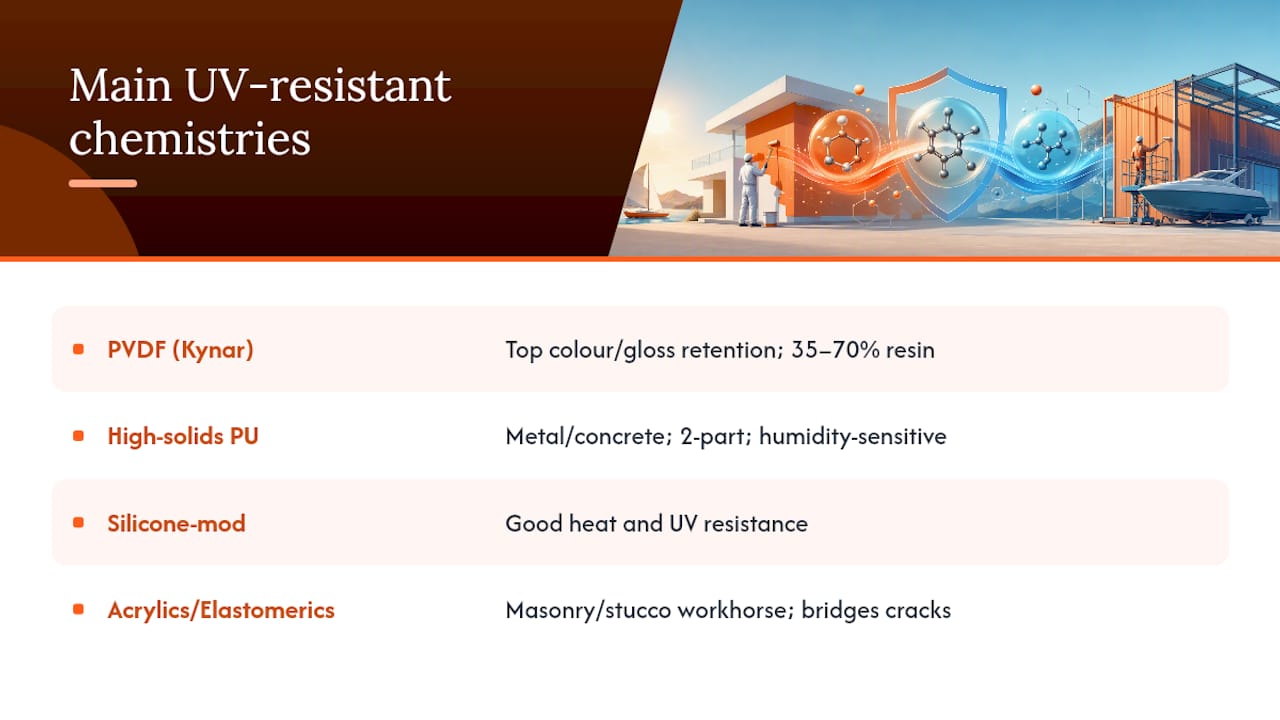
PVDF/fluoropolymer (Kynar or Kynar Aquatec-based): The benchmark for colour and gloss retention on high-exposure facades. APV Engineered Coatings’ NeverFade system requires 35–70% PVDF resin solids and provides accelerated weathering acceptance criteria including Delta E and chalking limits for direct use in specifications. Arkema’s Kynar Aquatec resin is the underlying technology. These systems are water-based, low-VOC, and spray-applied; they need a compatible primer and a manufacturer-approved applicator to validate the warranty.
High-solids polyurethane (PU): A strong performer on metal, concrete, and previously coated surfaces where PVDF is over-specified or cost-prohibitive. Carboline’s Carbothane 134 UV Ultra is a high-solids urethane topcoat with documented colour and gloss retention, DFT guidance, and cure time data. Resimac’s 508 UVPU is a solvent-based alternative with stepwise application instructions and corrosion test references. PU systems often require two-component mixing on site and are sensitive to humidity during application.
Silicone-modified coatings: Good heat and UV resistance, particularly on masonry and concrete. Less common for full facade work but useful on roofs and high-temperature metal surfaces.
High-performance acrylics and elastomerics: The workhorse for concrete, masonry, and stucco. Elastomeric systems bridge hairline cracks and tolerate movement; UV-stable acrylic topcoats extend colour life significantly over standard trade paints. Lower cost than PVDF or PU, but shorter colour retention life in high-UV zones.
Pro Tip: Require the PVDF resin solids percentage in writing for any Kynar-based system.
Surface preparation: what to verify before a single coat goes on
Surface prep is where most projects are won or lost. The Sherwin-Williams surface preparation guidance is unambiguous: inadequate prep accounts for up to 80% of coating failures. Require the following steps documented in the contractor’s scope:
- Cleaning and degreasing: High-pressure wash, solvent wipe on metal, mildew treatment on masonry
- Salt extraction: Mandatory on coastal sites; conductivity testing to confirm chloride levels are within acceptable limits before priming
- Mechanical abrasion: Grinding, sanding, or abrasive blasting to the specified SSPC or ISO surface preparation level (e.g. SSPC-SP6 / ISO 8501-1 Sa 2 for structural steel)
- Rust removal: Full removal to bare metal or to the specified cleanliness grade; no spot-priming over active corrosion
- Patching and crack repair: Filled, cured, and re-profiled before any primer is applied
- Priming within the recoat window: Primer applied within the manufacturer’s stated open time after surface prep
On-site tests to require before full application begins:
- Cross-hatch adhesion test (ASTM D3359) on the sample patch
- Salt contamination test (Bresle patch or equivalent) on coastal steel
- Visual surface profile check on blasted surfaces
- Wet film thickness (WFT) checks during application to confirm DFT targets will be met
Pro Tip: Insist on a sample patch of at least 1 m² on the actual substrate, cured for the manufacturer’s stated time, with a cross-hatch adhesion test result recorded before full application proceeds. A contractor who resists this is telling you something important.
Updated corrosion mapping using SANS ISO 9223 classifies coastal and industrial zones at C4–C5 corrosivity, requiring more aggressive surface prep and thicker or duplex protection systems than inland C2–C3 sites.
How to choose the right coating system for each substrate
The substrate determines the primer, the prep standard, and often the topcoat chemistry. Here is what to require by surface type:
Concrete and masonry (including stucco): Specify a high-build acrylic or elastomeric basecoat for crack bridging and movement tolerance, followed by a UV-stable acrylic or silicone-modified topcoat for colour retention. For facades with colour-critical finishes, a PVDF topcoat is worth the premium. Require alkali-resistant primer on new concrete.
Structural and architectural metalwork: Zinc-rich or epoxy primer to the specified SSPC/ISO prep level, followed by a PVDF or high-solids PU topcoat. For coastal zones classified C4–C5, a duplex system (hot-dip galvanising plus paint) or a thicker total DFT is standard practice. The SAISC/HDGASA corrosion mapping guidance supports selecting the appropriate system by corrosivity zone.
Timber and joinery: Flexible coatings with UV stabilisers and a penetrating primer or sealer that addresses moisture ingress. Rigid coatings crack at timber joints; specify a flexible PU or acrylic system rated for wood movement.
Previously painted surfaces: Require an adhesion test before any new coat is specified. If adhesion fails or the existing system is incompatible, a full strip-back is cheaper than a delamination failure 18 months later. Specify a tie-coat or adhesion primer where the existing system is sound but aged.
For colour choices that complement your exterior system, guidance on coordinating interior and exterior tones can help you carry a palette through from facade to joinery.
What should the written specification and warranty include?
A professional specification is a document, not a verbal agreement. Require these items in writing before work starts:
- Scope of work with substrate areas and access method
- Substrate assessment report with condition notes and photographs
- Primer and topcoat product names, manufacturer, chemistry, and batch traceability
- DFT targets (minimum and maximum) per coat and total system DFT
- Application method and equipment (airless spray, brush, roller, or plural-component)
- Environmental constraints: temperature range, humidity limits, wind restrictions
- Sample patch and adhesion test requirement, with pass/fail criteria stated
- Manufacturer field service or applicator approval reference
For testing, ask the contractor to reference:
- ASTM G154 (UV fluorescent lamp weathering) or ASTM D4587 with hours tested
- Delta E limit per ASTM D2244 (colour change) and chalking limit per ASTM D4214
Warranty language should state what is covered (film integrity, colour retention within a stated Delta E limit), the duration, and the conditions that void it, specifically incorrect prep, wrong primer, or unauthorised touch-ups.
Pro Tip: Request that the contractor photograph DFT gauge readings at multiple points during application and include them in the handover file. These records are your evidence if a warranty claim arises.
APV’s NeverFade guide specification requires manufacturer applicator approval and sample patches as warranty conditions. This is a standard worth applying to any high-performance system.
What should a professional quote include, and what drives the cost?
A complete quote should itemise:
- Site survey and substrate condition report
- Surface preparation: method, standard (SSPC/ISO level), and labour
- Repair and patching: areas, materials, and cure time
- Primer: product name, litres, coats, and DFT
- Topcoat: product name, litres, coats, DFT, and application method
- Scaffolding or access equipment
- Sample patch and adhesion testing
- Waste disposal and site protection
- Warranty administration and handover documentation
Timeline: A typical project runs from survey to final inspection over 2–4 weeks for a standard residential facade, longer for commercial or multi-storey work. Salt extraction on coastal steel adds 1–3 days. Curing between coats at Cape Town temperatures (typically 15–25°C) takes 8–24 hours per coat depending on the system. Weather windows for spray application narrow significantly in winter.
The main cost drivers are:
- Extent and method of surface preparation (blasting costs more than hand-sanding, but lasts far longer)
- Plural-component or airless spray equipment for high-solids PU or PVDF systems
- Product chemistry: PVDF/Kynar systems carry a premium over standard acrylics
- Scaffolding and access on multi-storey or complex facades
- Manufacturer field service attendance
As a cross-check on quoted paint volume: most professional topcoats cover 6–10 m² per litre at the specified DFT. If the quoted litres divided by your surface area falls well outside that range, ask the contractor to reconcile it against the product data sheet.
Contractor vetting checklist: questions and red flags
Before awarding a contract, work through this checklist:
Verification steps:
- Confirm the crew is in-house, not subcontracted; ask for names and employment confirmation
- Request photographs of at least two completed projects with similar substrate and exposure conditions
- Ask for two references from projects in comparable coastal or high-UV environments
- Request manufacturer applicator certificates for the specific product system quoted
- Confirm the contractor will conduct a sample patch and adhesion test before full application
Questions to ask:
- Which system are you specifying and why for this substrate and exposure?
- What primer are you using and is it approved by the topcoat manufacturer?
- What SSPC or ISO surface preparation level will you achieve, and how will you verify it?
- Will the manufacturer’s technical representative visit the site?
- What are the cure times between coats and what weather conditions will stop work?
- What exactly does the warranty cover, and what voids it?
Red flags:
- Prep described only as “clean and paint” with no standard referenced
- Quoted paint volume that implies coverage well above the product data sheet rate
- Refusal to do a sample patch or adhesion test
- No written warranty or a warranty that excludes colour retention
- Pressure to accept a price before a site inspection has been done
Reference check template: Ask previous clients: Did the contractor document prep and provide thickness readings? Were there any adhesion failures or early colour changes? Did the contractor return promptly for any warranty issues?
Inspection and maintenance plan to extend service life
Even the best UV-resistant exterior coating needs a maintenance schedule.
Annual actions for all sites:
- Visual inspection for chalking, colour shift, cracking, blistering, and corrosion at fixings
- Low-pressure wash to remove salt, soiling, and biological growth
- Photograph and log any defects with location and date
Coastal and high-exposure sites: Increase wash frequency to twice yearly. Check fixings and penetrations for early corrosion after the first winter.
| Interval | Action |
|---|---|
| Annual | Visual inspection, low-pressure wash, photograph and log defects |
| 3–5 years | Minor touch-ups at joints, fixings, and abraded areas; adhesion check |
| At service life milestone | Full substrate assessment, adhesion test, system compatibility check before recoat |
Keep a maintenance log with product batch numbers, application dates, DFT readings, and photographs. This record is what makes a warranty claim stick.
How do you evaluate contractor qualifications for UV-resistant systems?
Qualifications for high-performance coatings work go beyond a general painting licence. Look for:
- Manufacturer applicator approval: Sherwin-Williams, Carboline, APV/NeverFade, and Arkema all offer applicator programmes. Approval means the contractor has been trained on the specific system and is authorised to apply it under warranty conditions.
- SSPC certification: The Society for Protective Coatings (SSPC) offers contractor qualification programmes relevant to industrial and commercial protective coatings. An SSPC-QP1 or QP3 certification signals documented quality management for surface prep and application.
- Documented project history: Ask for a portfolio of projects with the same chemistry (PVDF, high-solids PU) and similar exposure conditions, with client references attached.
- Equipment capability: Plural-component spray systems for two-part PU or high-solids coatings require specific equipment. Confirm the contractor owns or has access to it; a contractor quoting a plural-component system but applying it by brush is a specification failure.
- Insurance and liability: Confirm public liability and contractor’s all-risk cover for the project value.
A contractor who can produce manufacturer approval letters, SSPC certification, and a project portfolio with references for comparable work is demonstrably different from one who cannot.
Common scams and pitfalls when hiring for UV-resistant coatings
The most common scam is not outright fraud. It is a contractor who quotes a premium product name, charges accordingly, and applies a cheaper substitute. Protect yourself:
- Require product batch numbers on delivery and cross-check them against the manufacturer’s website or technical representative before application begins.
- Watch the paint volume. A quote that names a high-solids PVDF topcoat but prices the job at the same rate as a standard acrylic is almost certainly not using the stated product.
- Avoid large upfront deposits. A standard payment structure is a deposit on materials, progress payments tied to verified milestones (prep complete, primer applied, topcoat complete), and a retention held until the sample patch adhesion test passes.
- Vague warranty language is a red flag. “Guaranteed for 10 years” with no written conditions is worthless. A real warranty names the product, the DFT, the prep standard, and the specific failure modes covered.
- Subcontractor chains dilute accountability. When the person who quoted the job is not the person on site, the specification often does not transfer. Confirm in writing that the quoting contractor’s own crew will apply the system.
Prominent Paints’ professional coating checklist reinforces that sample patches, manufacturer assistance, and weathering-aware scheduling are the markers of a genuine professional approach, not optional extras.
What does professional UV-resistant painting typically cost?
Cost ranges for professional UV-resistant exterior painting in South Africa vary significantly by system chemistry, substrate condition, and access requirements. As general guidance for the Cape Town and Winelands market:
- Standard high-performance acrylic system (prep, primer, two topcoats): R80–R150 per m² for straightforward masonry facades in good condition
- High-solids polyurethane system on metal or concrete (SSPC prep, epoxy primer, PU topcoat): R150–R300 per m², depending on prep extent and access
- PVDF/Kynar-based system (full specification with manufacturer field service): R250–R450+ per m² for facades where colour retention over 15+ years justifies the premium
Additional fees to budget for:
- Scaffolding or elevated access: R15–R40 per m² of facade area per week
- Salt extraction and conductivity testing on coastal steel: R5,000–R20,000 depending on area
- Manufacturer field service attendance: typically quoted separately by the manufacturer’s representative
- Adhesion and DFT testing documentation: usually included in a professional quote; if it is listed as an extra, that is worth noting
These are indicative ranges. The only reliable figure is a written quote from a contractor who has inspected the site, specified the system in full, and priced the prep honestly.
What is the typical timeline for a UV-resistant painting project?
A professional exterior coating project follows a predictable sequence, though the calendar duration depends heavily on weather, substrate condition, and system complexity.
Week 1: Survey and specification
Site inspection, substrate condition report, system specification, and quote preparation. Allow 3–5 business days from first contact to receiving a written quote from a thorough contractor.
Week 2: Mobilisation and surface preparation
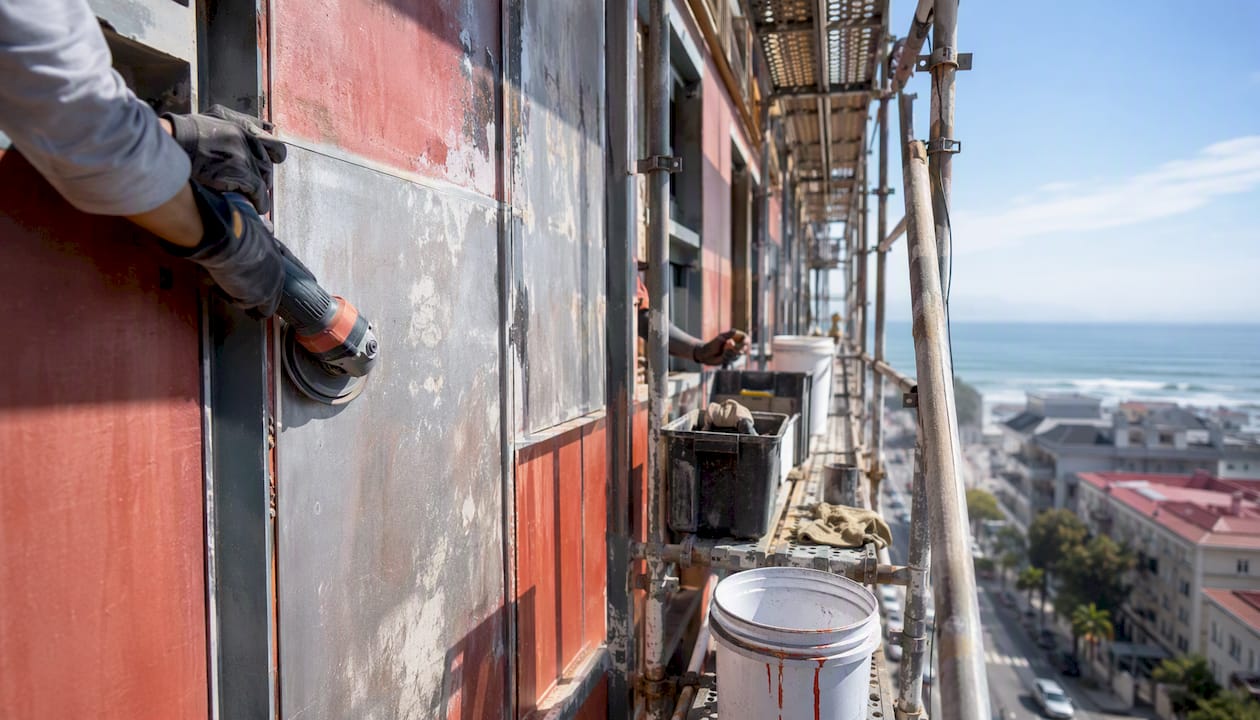
Scaffolding erected, surface cleaning, salt extraction (coastal sites), mechanical prep to the specified SSPC/ISO level, patching and crack repair. This phase takes 3–7 days for a standard residential facade; longer for heavily corroded metal or large commercial buildings.
Week 3: Sample patch, priming, and first topcoat
Sample patch applied and adhesion-tested before full priming begins. Primer applied and allowed to cure within the manufacturer’s recoat window. First topcoat applied. Each coat requires 8–24 hours cure time at typical Cape temperatures.
Week 4: Final topcoat, inspection, and handover
Final topcoat applied, DFT readings taken and recorded, visual inspection completed, and handover documentation (photographs, batch numbers, thickness log, warranty certificate) provided to the owner.
Total elapsed time: 3–5 weeks for a standard residential project. Commercial or multi-storey facades with complex access, extensive prep, or plural-component systems typically run 6–10 weeks. Winter projects extend further due to narrower weather windows for spray application.
What the best UV-resistant exterior work actually looks like in practice
Most property owners focus on the topcoat. The contractors who consistently deliver long service life focus on the substrate.
The pattern in projects that fail early is almost always the same: a contractor who skipped or rushed prep, applied the primer outside the manufacturer’s recoat window, or used a product that did not match the specification. The topcoat chemistry is almost never the primary failure cause. This matters because it means the cheapest quote that names the right product is not the same as the cheapest quote that will deliver the right result.
For Cape Town, the Winelands, and the Overberg, the exposure combination of intense UV, coastal salt, and significant thermal cycling means the margin for error in specification is smaller than in milder climates. A system that would last 10 years in Johannesburg may last 5 years on a Strand beachfront if the salt extraction step was skipped and the primer was not moisture-tolerant.
The contractors worth hiring are the ones who slow down at the prep stage, insist on the sample patch, and hand you a file of photographs and thickness readings at the end. That documentation is not bureaucracy. It is the evidence that the work was done to specification, and it is what makes a warranty claim enforceable.
Capeapexpainters: preparation-first exterior coatings for Cape properties
Property owners in Cape Town, the Cape Winelands, and the Overberg face a specific exposure challenge that generic painting contractors often underestimate. Capeapexpainters was built around that reality.

Every project starts with an in-house diagnostic surface assessment, not a visual glance from the driveway. The team specifies the coating system to the substrate and the exposure zone, conducts a documented sample patch with adhesion testing, and provides full handover paperwork including DFT readings and product batch numbers. The crew is in-house, which means the person who assessed your property is accountable for the result. For complex systems, Capeapexpainters liaises directly with manufacturers where field service is warranted.
If you want a written specification, documented prep, and a contractor who will still be answering calls when the warranty period matters, request a site survey from Capeapexpainters.
Sources
When finalising a specification, review these primary sources alongside your contractor’s product data sheets:
- Surface Preparation — Sherwin‑Williams
- NeverFade® Exterior Paints with Kynar Aquatec — APV Engineered Coatings (guide spec PDF)
- Coastal vs Inland Painting: Choosing the Right Paint for South African Conditions — Prominent Paints
Request the product data sheet and manufacturer field service contact for every product named in your contractor’s quote. If the contractor cannot provide them, that is a specification gap worth resolving before work begins.