
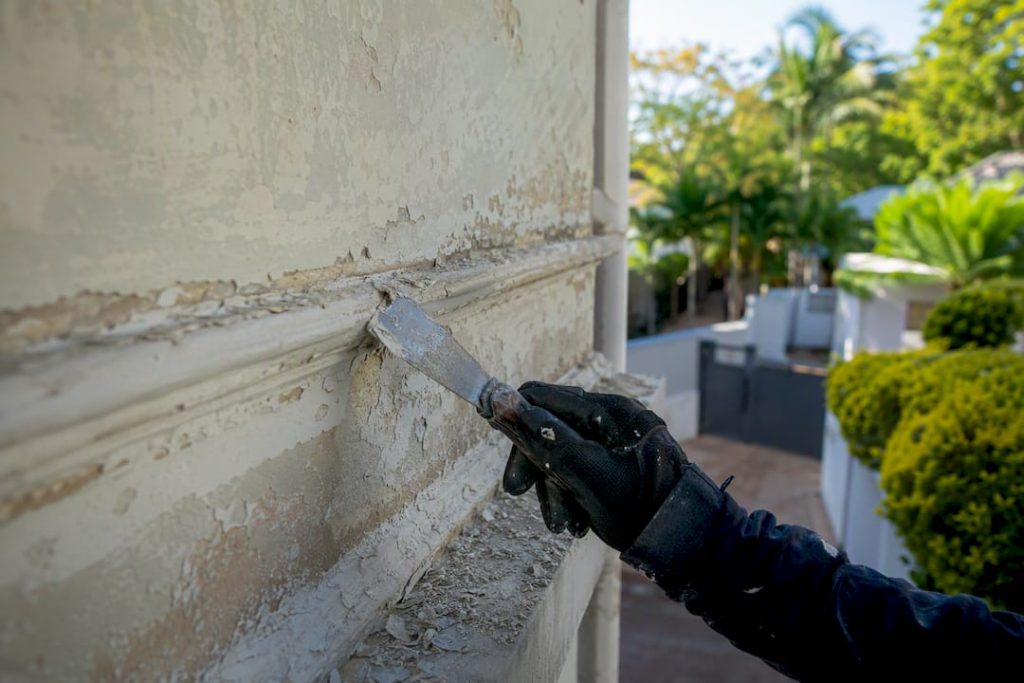
You need to repaint when paint is flaking, chalking, or when moisture or staining shows the coating no longer protects the surface underneath. The most urgent signs are peeling, moisture damage, heavy chalking, and stains that keep bleeding through fresh coats. Cosmetic fading can usually wait a season; anything involving softened wood or active damp cannot. Run the checklist below before you call anyone.
TL;DR:
- Peeling, bubbling, or cracking paint indicates moisture intrusion or poor adhesion, requiring scraper removal, primer, and professional assessment if rot is involved.
- Fading from UV exposure is more prominent on darker, flat finishes, especially on sun-facing walls, and can be mitigated with UV-resistant coatings.
- Chalky surfaces show the breakdown of paint binder under UV, with early washing and priming delaying the need for a full repaint, but heavy chalking often signals the need for a complete refresh.
- Persistent stains like tannins or nicotine bleed through paint and require stain-blocking primers to prevent future ghosting, rather than simple recoating.
- Moisture issues such as mould, soft wood, or blistering are costly if painted over and should be diagnosed and repaired before any repaint to avoid rapid failure.
Table of Contents
- 1. Peeling, cracking, or bubbling paint
- 2. Fading or discoloration from sunlight and UV
- 3. Chalking or powdery residue
- 4. Stains or marks that won’t clean
- 5. Moisture-related failures: mould, mildew, soft wood, and blistering
- 6. Visible wear in high-traffic or exposed areas
- 7. Rust on metal and rot on wood beneath the paint
- 8. Age and typical repaint intervals
- What to do next: inspection checklist and repair-before-paint steps
- How a preparation-first approach protects your repaint investment
- Lessons from the field: what actually costs homeowners money
- Get a professional inspection from Cape Apex Painters
- Sources
1. Peeling, cracking, or bubbling paint
Peeling and bubbling paint almost always trace back to moisture intrusion or poor adhesion between coats. Press a piece of tape onto the surface and pull it off. If paint lifts with it, adhesion has failed. Probe the wood beneath any bubbled patch with a screwdriver; softness means rot, not just a paint problem.
- Scrape all loose material back to a sound edge before priming
- Identify why adhesion failed (damp wall, glossy old coat, incompatible primer)
- Call a professional if rot extends behind trim or into structural framing
Pro Tip: Never paint over a bubble hoping it will flatten. Cut it open first. If it’s wet inside, you have a leak to trace before any paint goes near it.
2. Fading or discoloration from sunlight and UV
Compare a sun-facing wall to a shaded one on the same house. A noticeable colour gap confirms UV fade rather than dirt, which usually washes off with a hose and mild detergent. Darker colours and flat sheens fade fastest because they absorb more radiation and offer less surface reflection than glossy finishes.
- Reds and blues typically fade faster than greys or whites
- Gloss and satin finishes resist fading longer than matte
- Ask for UV-resistant exterior coatings when repainting sun-exposed elevations
3. Chalking or powdery residue
Rub your palm firmly across the exterior wall. A fine, powdery residue on your skin means chalking, a sign the paint binder is breaking down under UV and weather exposure. It’s most common on older oil-based coatings and unshaded south or west-facing walls.
- Rub a dark cloth against the surface; visible powder confirms chalking
- Light chalking often responds to a thorough wash and a bonding primer
- Heavy, deep chalking that keeps returning after washing calls for a full repaint
Catching chalking early can genuinely postpone a full repaint by a year or two, but it won’t reverse the underlying breakdown forever.
4. Stains or marks that won’t clean
Nicotine, water rings, grease, and tannins from wood knots have a habit of ghosting through fresh paint within weeks. If a stain reappears after washing or even after a previous repaint, ordinary paint won’t fix it.
- Yellowish halos on ceilings usually mean past water damage, not current leaks
- Tannin bleed shows as brown streaks, common on cedar and pine trim
- A stain-blocking primer is the only reliable fix; regular primer will not stop bleed-through
Test it cheaply: dab the stain with rubbing alcohol on a cloth. If colour transfers, you’re dealing with something that needs sealing, not just recoating.
5. Moisture-related failures: mould, mildew, soft wood, and blistering
Moisture problems are the ones homeowners most often paint over, and it’s the most expensive mistake on this list. Black or greenish speckling, a musty smell, blistered paint near downspouts, or wood that gives under a screwdriver all point to trapped water. Painting over any of these buys you a few months at most before the same failure reappears, often worse.
- Check caulk lines around windows, doors, and roof intersections for gaps or cracking
- Probe window sills, deck boards, and fascia for soft or spongy spots
- Trace bubbling near plumbing vents or gutters back to the actual leak source
- Look for mildew in bathrooms, north-facing walls, and anywhere airflow is poor
Pro Tip: If you can smell damp before you can see it, the moisture has been there longer than the stain suggests. Trust your nose over your eyes on this one.
6. Visible wear in high-traffic or exposed areas
Hallways, stair risers, door edges, and light switch plates take the most physical contact in any home, so they show wear years before the rest of a wall needs attention. Scuffs and chips here are often cosmetic, not structural.
- A handful of scuffs on one wall usually means a touch-up, not a repaint
- Widespread rubbing that reveals the primer or bare substrate calls for a full repaint of that surface
- Keep a labelled quart of your wall colour and sheen on hand for quick touch-ups between full repaints
7. Rust on metal and rot on wood beneath the paint
Rust bubbling under paint on railings, gutters, or metal window frames means corrosion has already started beneath the surface, and a fresh coat over it will crack within months. On timber, splintering, a hollow sound when tapped, or crumbling at joints signals decay that paint cannot mask.
- Orange bleed-through on white trim usually means rusting fasteners underneath
- Wood that flakes or crumbles at the touch needs replacement, not filler
- Get a professional assessment before repainting any surface with structural rot or advancing rust, since stabilisation work often has to happen first
8. Age and typical repaint intervals
Interior rooms wear at different speeds. Bathrooms typically need repainting every 3 to 4 years because of steam and humidity, kitchens every 4 to 5 years due to grease and heat, and living areas can often stretch to 5 to 7 years. Trim and doors, handled less by moisture and more by contact, can run 8 to 10 years or longer.
Exteriors are harder to pin down. Ranges of 5 to 10 years are common, but coastal salt air, intense UV exposure, or a poorly prepared previous coat can shrink that window considerably. Climate and substrate quality matter more than the calendar.
| Area | Typical repaint interval |
|---|---|
| Bathrooms | 3–4 years |
| Kitchens | 4–5 years |
| Living areas | 5–7 years |
| Trim and doors | 8–10+ years |
| Exterior walls | 5–10 years (shorter in coastal or high-UV zones) |
Treat these numbers as inspection triggers, not deadlines. A wall that hits its interval and still looks sound doesn’t need touching; one that shows chalking or peeling three years early does.
What to do next: inspection checklist and repair-before-paint steps
Work through issues in order of urgency rather than trying to fix everything at once.
- 0 to 30 days: Address active leaks, soft or rotting wood, mould, and peeling near windows or rooflines. These get worse fast and cost more the longer they sit.
- 30 to 180 days: Schedule chalking cleanup, stain sealing, caulk replacement, and touch-ups in high-traffic spots.
- Plan within 12 months or more: Budget for full repaints driven purely by fading, colour changes, or age hitting the intervals above.
Some of this is genuinely DIY territory. Washing chalky siding, recaulking a window, and patching a small scuff mark are well within reach for most homeowners, and doing them promptly is cheaper than waiting for a full repaint. Diagnosing the source of a damp patch, replacing rotted trim, treating rust, or stripping large areas of failed paint is where hiring a professional pays for itself, both in the fix and in avoiding repeat callouts.
Before requesting a quote, walk the property with your phone. Photograph every failure point, note rough measurements of affected wall or trim area, and list which rooms or elevations need attention. A regular annual inspection focused on caulk, downspout areas, and shaded corners catches most of this before it becomes expensive.
| Priority | Typical issues | Who handles it |
|---|---|---|
| 0–30 days | Active leaks, soft wood, mould, peeling near openings | Professional diagnosis usually needed |
| 30–180 days | Chalking, stain sealing, caulk gaps, touch-ups | DIY-friendly for most homeowners |
| 12 months+ | Full repaint due to age, fading, colour change | Planned project, get quotes early |
How a preparation-first approach protects your repaint investment
Most paint failures trace back to what happened before the paint went on, not the paint itself. Cape Apex Painters builds every project around a preparation-first sequence: diagnose the surface, resolve any damp before touching a brush, repair the substrate, prime correctly, then apply a coating suited to the specific exposure the wall faces.
- Diagnostic assessment catches chalking, hidden moisture, and adhesion problems before a quote is finalised
- Damp proofing addresses the root cause of blistering and mould rather than painting over it temporarily
- Substrate repair fixes soft wood, cracked plaster, and rust before any coating is applied
- Correct priming stops stain bleed-through and gives new paint something stable to grip
- Climate-suited coatings account for UV intensity, salt air, and rainfall exposure specific to the property’s location
Skipping any one of these steps is how a repaint that should last seven years fails in two. Because Cape Apex Painters uses full-time, in-house painters rather than rotating subcontractors, the same standard of preparation gets applied on every job, which matters most on jobs where damp or old coating failures are already suspected.
The paint is never the weak point. It’s almost always what’s underneath it, or what wasn’t dealt with before the roller touched the wall.
Lessons from the field: what actually costs homeowners money
The single most expensive mistake I keep seeing is painting straight over an active moisture problem because it looks dry on the surface that day. It never stays hidden. Within a season, the same bubble or stain comes back, usually bigger, and now you’re paying for the paint twice plus the repair you delayed.
Skipping primer is the second-most common shortcut, especially on stained ceilings and tannin-heavy wood trim. A $15 can of stain-blocking primer on a small patch has saved more than one homeowner from redoing an entire ceiling six months later.
On timing: don’t wait for a wall to look bad before budgeting for it. Use the intervals as a planning tool. If your exterior is entering year seven and you live near the coast, get it inspected now, while repairs are still small and cheap, rather than after the next storm season makes the decision for you.
— Thinus
Get a professional inspection from Cape Apex Painters
Skip the guesswork on whether your walls need a full repaint or just a patch job. Cape Apex Painters sends an in-house painter to assess the surface directly, price the damp or prep work honestly, and specify a coating built for Cape Town, the Winelands, or Overberg conditions rather than a generic finish.

The advantage over a subcontractor-based outfit is accountability: the crew that inspects your walls is the same crew that preps and paints them, so nothing gets lost between quote and completion. That matters most on jobs involving damp proofing or rot repair, where a rushed prep job undoes the paint within a year. For door and trim colour decisions during a repaint, these interior door colour guidelines are worth a look before your painter arrives.
Whether you’ve spotted chalking on a boundary wall or a stain that keeps bleeding through the ceiling, request an on-site assessment and quote and get a straight answer on what needs fixing before it gets worse.