
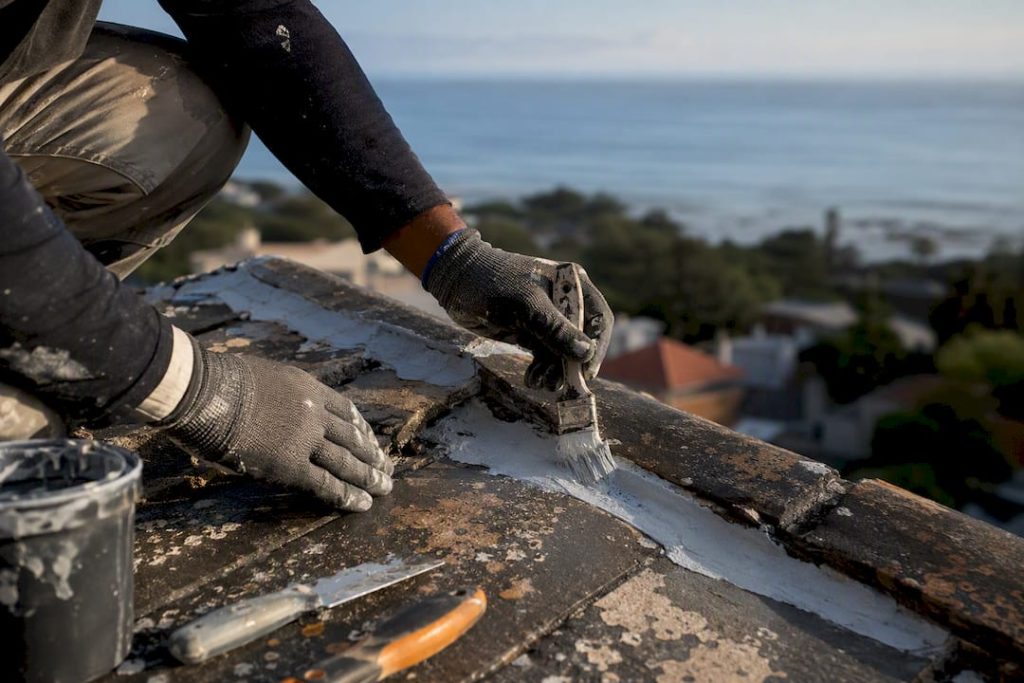
If your roof started leaking after painting, the paint job likely exposed or trapped an existing problem rather than causing a new one. Failed flashing, moisture sealed under the film, or a coating unsuited to your roof’s ponding and movement are the usual suspects. Protect your ceilings now, check the attic for flow lines, and book a diagnostic inspection or a controlled hose test before you touch a paintbrush again.
TL;DR:
- Moisture trapped under old or improperly applied coatings can cause blistering, delamination, or leaks within weeks of painting, especially in ponding areas.
- Cracks, damaged tiles, or degraded flashing hidden by paint often allow leaks to persist or reappear despite new coatings.
- Selecting the wrong coating chemistry for the roof’s environmental conditions or skipping proper surface preparation frequently leads to coating failure.
- Accurate leak diagnosis requires a methodical inspection of the attic and exterior, including controlled hose tests at specific points, rather than guessing based on ceiling stains.
- Proper repairs, including replacing flashings, fixing deck defects, and confirming substrate dryness, are essential before any coating application to ensure long-term leak prevention.
Table of Contents
- Common causes of leaks appearing after painting
- Why roof coatings and paint fail even when applied correctly
- How to diagnose the true source of a leak
- When to repair versus when to replace
- What a proper pre-paint workflow looks like
- How Cape Apex Painters approaches leak-free roof coating
- Get a diagnostic roof inspection before your next repaint
- Sources
Common causes of leaks appearing after painting
Paint doesn’t create leaks out of nothing. In most cases, it either seals in a problem that was already there or fails to hold up against conditions it was never suited to handle. Recurring leaks often trace back to a repair that patched the symptom, not the cause, such as flashing left in its degraded state under a fresh coat. That gap between what got painted and what actually needed fixing is where most callbacks originate.
A handful of failure modes show up again and again on roofs that leaked shortly after a repaint:
- Trapped moisture under the film. Painting over a substrate that hasn’t dried out seals water in rather than out, and you’ll often see blistering or delamination within weeks as vapor pushes against the coating from underneath.
- Cracks, tile damage, or flashing failures hidden by paint. A coat of paint can make a hairline crack in a tile or a lifted flashing edge look fine on the surface while the leak path underneath stays wide open.
- Wrong coating for ponding conditions. A film designed for sloped, well-draining sections will often fail where water sits for hours after rain, because it wasn’t formulated to resist sustained hydrostatic pressure.
- Thin film build or skipped detailing at seams and penetrations. Corners, curbs, vent boots, and drains are where coatings fail first if the applicator rushed the edges or under-applied product to save material.
- Age-related structural fatigue that paint can’t address. On an older roof, the deck, membrane, or tiles may simply be past their working life. Paint is cosmetic. It was never going to be the fix.
Amateur painting of asphalt shingles compounds several of these risks at once. Coating shingles can interfere with the granules and trap moisture underneath the mat, and it can void a manufacturer’s warranty outright. If the actual issue was algae staining or cosmetic discoloration rather than a structural defect, professional cleaning resolves it without introducing any of the risks that come with painting over shingles.
Why roof coatings and paint fail even when applied correctly
A coating is a thin, dumb layer. It has no idea what’s happening beneath it, and it will faithfully replicate any weakness in the substrate it’s applied to. Coating failures generally trace back to one of two root causes: the product chemistry doesn’t match the roof’s real-world conditions, or the coating never actually bonded because of moisture or skipped prep.
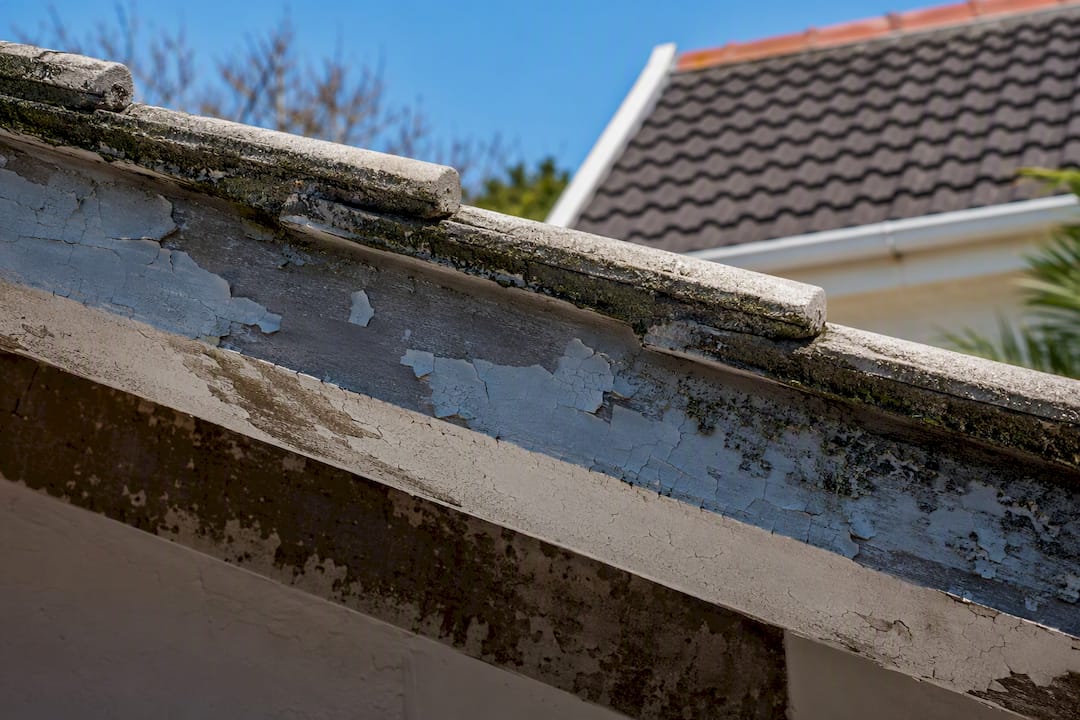
On the chemistry side, acrylics handle UV exposure well but tend to struggle with standing water. Silicone resists ponding better but scuffs and stains more easily. Polyurea and polyurethane systems offer stronger movement tolerance for roofs that expand and contract significantly, but they cost more and demand tighter application control. Picking the wrong one for your roof’s drainage and thermal behavior sets the coating up to fail regardless of how well it goes on.
Several application-side issues show up constantly on failed jobs:
- Adhesion failure from substrate moisture or contamination. Dust, chalking paint, algae film, or residual dampness all block a proper bond, so the new coat sits on top rather than gripping in.
- Thin film build. Rolling on a single quick coat to save time leaves a membrane too thin to bridge hairline movement or resist abrasion.
- Missed laps and edge detailing. Seams, parapets, and drain edges need extra attention. Skip them and you’ve built a leak path into the job on day one.
- Thermal cycling. Roofs expand and contract daily. A rigid, non-elastic film will crack over time where a flexible system would have moved with the substrate.
- Ponding-driven hydrostatic pressure. Water sitting on a coated surface for extended periods pushes against seams and pinholes far harder than a quick rain shed ever would.
Applying a waterproof coating over cracked or damp concrete without repairing the substrate first is a near-guaranteed way to see the leak return, because waterproofing only works as a system that includes crack repair, correct slope, and reinforced joints, not as a standalone top coat.
Pro Tip: Ask any contractor for a small test patch before committing to the full roof. A test patch that fails to bond or blisters within a few days tells you the coating or prep is wrong before you’ve paid for the whole job.
How to diagnose the true source of a leak
Ceiling stains lie. Water travels along rafters, decking, and insulation before it drips somewhere visible, so the wet patch on your ceiling is rarely directly below the actual entry point. A methodical check beats guessing every time.
- Start in the attic. Look for flow lines, dark streaks, wet or compressed insulation, and any decking that feels soft or springy underfoot. This is where the real leak path usually reveals itself.
- Trace stains uphill toward the roofline. Follow the wet trail as far as it goes and check every penetration along the way: vent stacks, skylights, chimneys, and pipe boots are the highest-risk points on any roof.
- Inspect the exterior methodically. Look for cracked or lifted tiles, fasteners backing out, and flashing showing rust or gaps where it meets a wall or chimney.
- Run a controlled hose test. Start at the lowest point of the suspected area and work upward gradually, running water for several minutes at each spot while someone else watches the attic for the first sign of moisture. Never guess by soaking the whole roof at once. It won’t tell you where the leak actually starts.
- Know when to stop and call a professional. Saturated insulation, a soft or spongy deck, or water showing up through multiple unrelated paths are signs the problem has gone beyond a DIY fix and needs a trained eye.
Manufacturer guidance is consistent on this point: a professional roofer should inspect flashings, penetrations, and the underlayment before anyone decides between a patch and a full repair or replacement. If you’re working alone, keep a ladder stable, wear rubber-soled shoes, and never run a hose test on a wet or icy roof surface.
When to repair versus when to replace
Not every leak justifies tearing off a roof section, and not every leak deserves another patch either. The decision comes down to a handful of practical factors: how localized the damage is, whether the deck underneath is sound or soft, whether the area holds standing water after rain, how many separate leak paths you’ve found, and how old the roofing system already is.
A single flashing failure on an otherwise sound, well-draining roof is a repair job. Multiple leak paths, a spongy deck, or a roof already past its expected service life point toward a bigger intervention. If a previous owner or contractor already patched this same spot once before, that’s a signal the underlying cause was never actually fixed, and another surface patch will likely fail the same way.
Durable repairs share a few common traits regardless of roof type:
- Flashings get replaced, not caulked over. A bead of sealant on failing flashing buys you months. Proper flashing replacement and sealing buys you years.
- Deck or tile defects get physically corrected first. Soft decking gets replaced. Cracked tiles get swapped out. No coating goes over a compromised substrate.
- The assembly gets dried out before anything is recoated. Moisture readings need to fall within the coating manufacturer’s stated limits, not just look dry to the eye.
- Joints and drains get reinforced, since a coating alone won’t bridge structural movement at these points, no matter how thick the film.
A reasonable contractor will give you a written repair list and state a moisture threshold the substrate has to hit before recoating begins, along with the coating’s target dry film thickness (DFT) and a test patch result. If a property has already suffered interior water damage from a prior leak, restoring the affected areas properly, including drying out framing and finishes, matters as much as fixing the roof itself. Structured water damage restoration steps exist for exactly this reason, and skipping that stage while focusing only on the roof leaves hidden moisture behind walls and ceilings.
Pro Tip: Ask for a written drying timeline, not just a start date for painting. Concrete and masonry substrates can take days longer than manufacturers advertise to reach a safe moisture level in humid coastal conditions, and coating too early is one of the most common causes of an early repeat failure.
What a proper pre-paint workflow looks like
A roof leak that shows up right after painting is almost always a workflow failure somewhere upstream of the paintbrush. The fix isn’t a better paint. It’s a better process before the paint ever goes on.
A competent contractor should walk through the following before a single coat is applied:
- Full inspection of flashing, fasteners, cracks, and organic growth, with every defect written down before pricing the job, not discovered halfway through.
- Confirmed substrate dryness within the coating manufacturer’s stated moisture limits, verified with a moisture meter rather than a visual check.
- Coating chemistry matched to the roof’s real exposure, meaning ponding areas, movement-prone sections, and UV-heavy zones each get the product suited to them rather than one blanket system for the whole roof.
- Dry film thickness targets specified and checked, since a coating applied too thin will fail early regardless of how good the product itself is.
- Reinforcement at curbs, drains, and penetrations, using reinforcing tape and compatible primers rather than relying on the top coat alone to bridge these high-movement zones. Chimney flashing in particular is a frequent failure point, and proper masonry and flashing repair at that junction prevents a lot of callback leaks before they start.
Before you sign off on any job, ask for a written inspection report, an itemized repair list, product data sheets for the coating being used, stated DFT targets, and a workmanship warranty. A contractor who won’t put repairs in writing before recoating is asking you to trust a process you can’t verify.
How Cape Apex Painters approaches leak-free roof coating
Every job starts with a diagnostic inspection, not a paint tin. We check for damp, degraded flashing, and substrate damage first, and we remediate those issues before any coating touches the roof. Our team is full-time and in-house, so the crew that inspects your roof is the same crew that finishes it, which matters when accountability for a callback needs to sit with one company. Our damp-proofing methods and coating specifications are chosen for what the Cape’s UV exposure, rain, and salt air actually do to a roof over time, not for what looks good on a spec sheet.
— Thinus
Get a diagnostic roof inspection before your next repaint
If a previous paint job leaked, the smarter move is a proper diagnostic inspection, not another coat over the same unresolved problem. Capeapexpainters runs a full assessment that includes moisture readings, a check of every flashing and penetration, and a written repair list before any quote is finalized, so you know exactly what’s being fixed and why.

Our services cover damp-proofing, substrate repair, and coatings specified for Cape Town, the Cape Winelands, and the Overberg’s particular mix of sun, rain, and coastal salt. Because our painters work in-house rather than through subcontractors, the same team that diagnoses the problem is the one accountable for the fix. If your roof started leaking after a repaint, request an inspection or quote and get a repair plan built around what your roof actually needs, not another coat over the same hidden fault.
Sources
For more on flashing inspection and repair decisions, see GAF’s roof leak guidance. For hose-test technique, see Lowe’s step-by-step guide.
- GAF — Roof leak repair
- Lowes — How to repair a leaky roof
- Oak Ridge — Why roof coatings fail
- PT Hissan Trading — Why concrete roofs leak after waterproof paint