
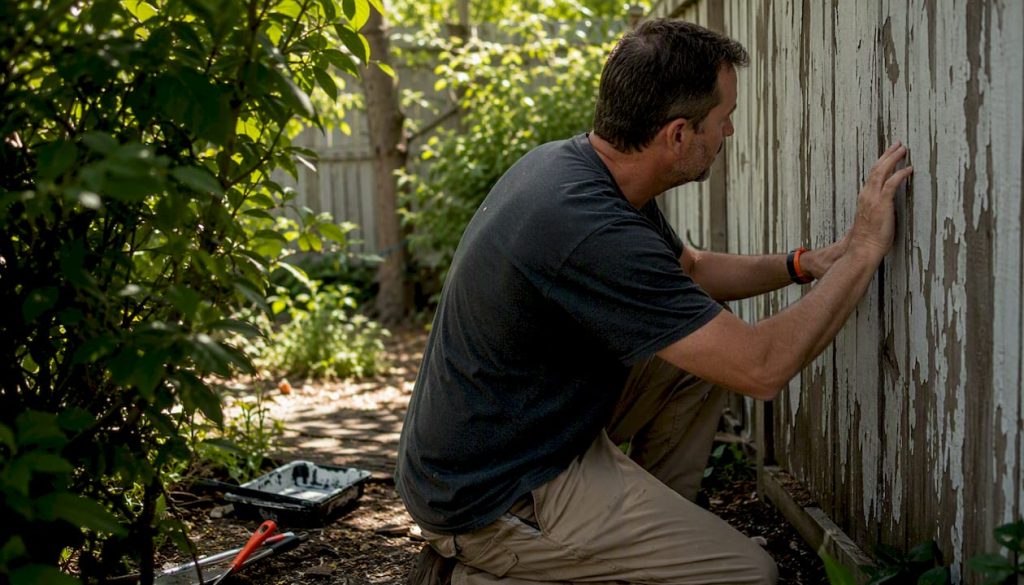
If your home was built before 1978, assume lead-based paint may be present somewhere in it. That is not alarmism. The EPA estimates that most homes built before 1940 contain some lead paint, and even homes built between 1960 and 1978 often show a significant prevalence. The single best first move: stop disturbing any suspect paint surfaces and either run a recognized screening test or call an EPA-certified inspector before any work begins.
Quick do/don’t before you read further:
- Do treat peeling or chipping paint in a pre-1978 home as lead-contaminated until proven otherwise
- Do keep children and pregnant people away from deteriorated paint areas immediately
- Do call the EPA hotline (1-800-424-LEAD) or your local health department if you are unsure what to do next
- Don’t sand, scrape, or heat-strip suspect paint without lead-safe practices in place
- Don’t dry-sweep dust from a disturbed paint area
- Don’t assume paint is safe just because it looks intact or has been painted over
Table of Contents
- 1. When to suspect lead paint: age, location, and condition
- 2. What DIY test kits can and cannot tell you
- 3. Professional testing options: inspection, risk assessment, and XRF
- 4. How to read your test results and what to do next
- 5. Immediate steps if you suspect lead paint or get a positive result
- 6. When to hire a certified professional and how to vet them
- 7. Typical costs and timelines for testing and remediation
- 8. Safe remediation options after a positive test
- 9. Common myths about lead paint, corrected
- Key takeaways
- The trade-off most homeowners get wrong
- Useful sources and where to find certified help
1. When to suspect lead paint: age, location, and condition
Home age is the most reliable first indicator. Pre-1978 construction is the legal threshold in the U.S. because that is when the federal government banned lead-based paint for residential use. The older the home, the higher the probability: pre-1940 homes were often painted with paint containing very high lead concentrations, and the EPA estimates that 87% of homes built before 1940 contain some lead paint.
Location within the home matters almost as much as age. Lead paint was used heavily on surfaces that needed durability, which means friction and impact surfaces are your highest-risk zones:
- Window sills, frames, and channels (friction from opening and closing creates fine dust)
- Door frames and doors, especially around the latch and hinge edges
- Stair railings, balusters, and treads
- Exterior porches, columns, and railings
- Trim, baseboards, and crown molding
- Chewable surfaces at child height, such as crib rails and windowsills
Paint condition is what turns a low-level risk into an active hazard. Deteriorated paint, meaning paint that is peeling, chipping, cracking, chalking, or showing an alligator-skin pattern, releases lead dust and chips that can be ingested or inhaled. Intact paint on a surface that nobody disturbs is a much lower immediate concern. The problem is that “intact” changes the moment you start a renovation.
Pro Tip: Start your visual check at windows. Window channels are the single most common source of lead dust in older homes because every open-and-close cycle grinds paint layers against each other. If you see chalky residue or paint buildup in the channel, treat it as a lead hazard and test before touching it.
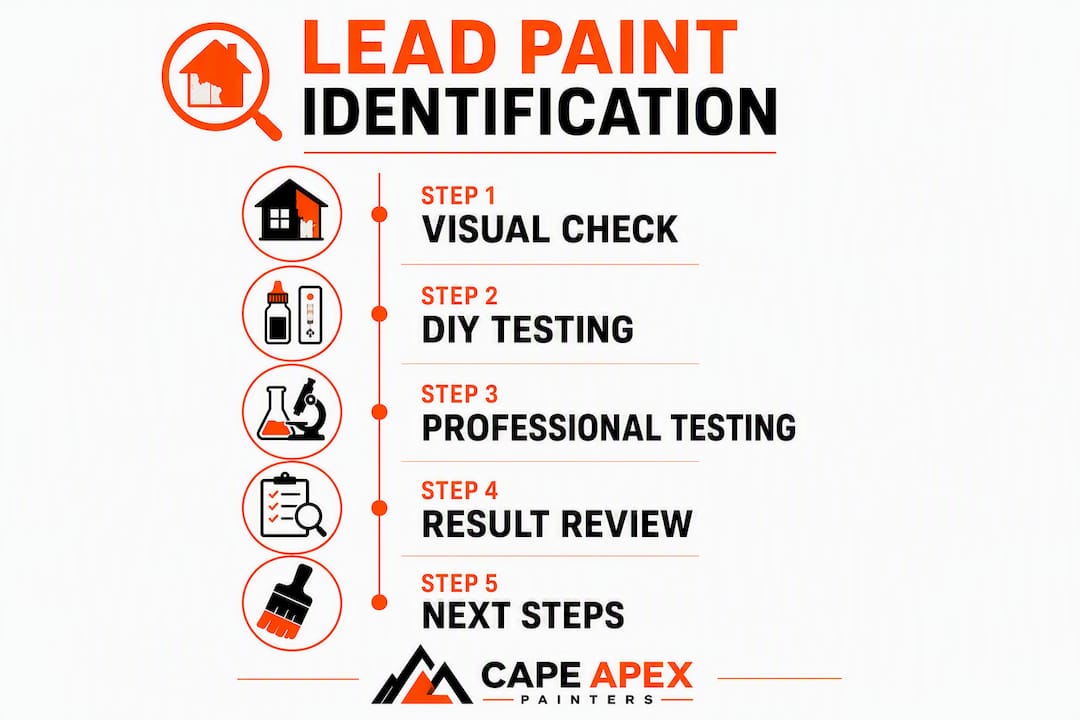
A HUD visual assessment can identify deteriorated paint as a defined hazard condition, but it cannot confirm lead content. Visual inspection alone is never enough for a definitive answer.
2. What DIY test kits can and cannot tell you
Consumer swab kits work through a color-change chemical reaction. You break a capsule inside the swab, rub it on the painted surface, and watch for a color shift (typically pink or red) that signals the presence of lead. The process takes a few minutes and costs roughly $10–$40 per kit at hardware stores.
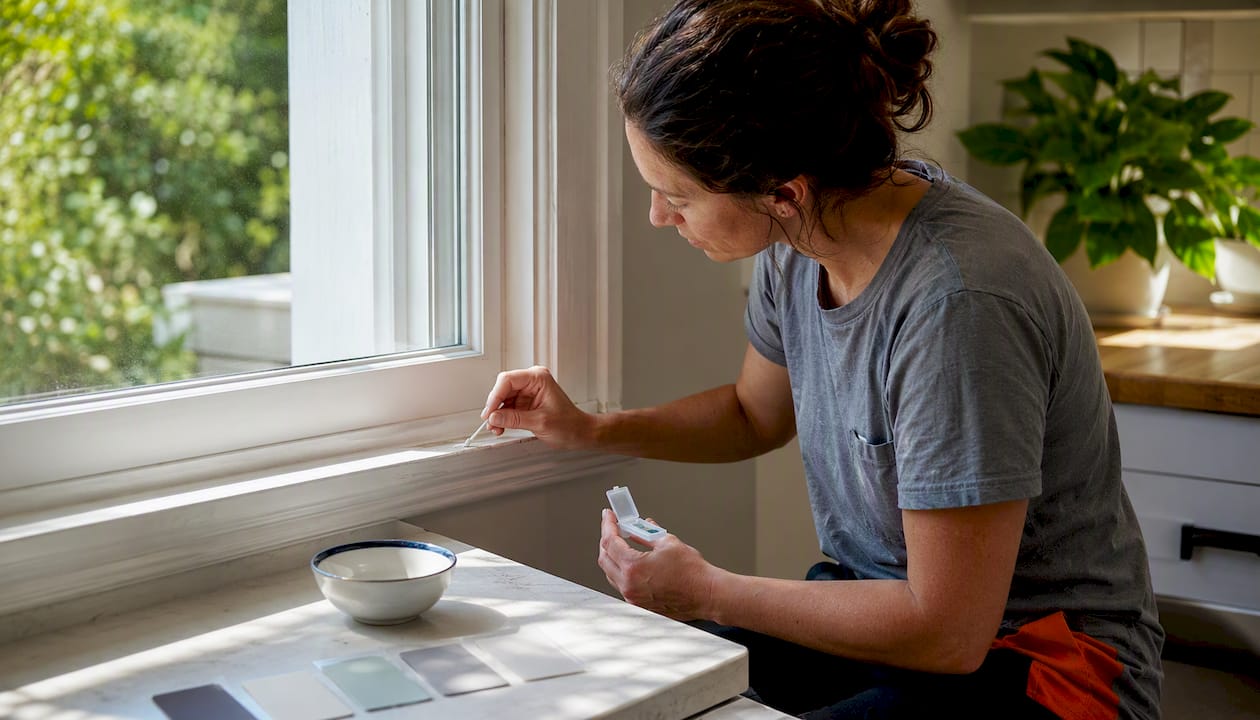
The EPA recognizes a small number of kits for professional use under the Renovation, Repair and Painting (RRP) rule, specifically LeadCheck™ and D-Lead®. These are the same kits sold to consumers, but the EPA’s recognition applies to trained renovators following a specific protocol, not casual home use.
That limitation is the critical one. Lead paint in older homes is almost always buried under multiple layers of newer paint. A swab kit only reacts to what it physically contacts. If the top layer is lead-free latex from 1995, the kit may return negative even when a lead-heavy layer from 1955 sits directly underneath. Sanding through that top layer during a renovation exposes the hazardous layer instantly.
A positive DIY result is reliable as a signal: lead is present at or near the surface. A negative result means only that lead was not detected in that specific spot at that depth. Treat a negative result as a reason to investigate further, not a clearance.
DIY kits are useful for a quick preliminary screen, particularly when you want to decide whether to escalate to professional testing. They are not a substitute for professional methods when you are planning a renovation, when children or pregnant people live in the home, or when you need documentation for a real estate transaction.
3. Professional testing options: inspection, risk assessment, and XRF
There are three professional-grade approaches, and choosing the right one depends on what question you actually need answered.
“EPA and HUD define two distinct professional services: a lead-based paint inspection, which identifies where lead paint is located, and a risk assessment, which determines whether lead hazards currently exist and recommends specific actions.”
— EPA, How to Make Your Home Lead Safe
A lead-based paint inspection tells you which surfaces contain lead-based paint and at what concentrations. It does not tell you whether those surfaces currently pose a hazard. Use it when you want a complete map of lead paint locations before purchasing a home or planning a major renovation.
A risk assessment goes further. It includes dust and soil sampling alongside paint testing and produces a report that identifies active hazards and recommends specific control actions. This is the test to commission when children or pregnant people are in the home, or when you already know lead paint is present and need to know whether it is currently causing exposure.
| Method | Accuracy / detection | Invasiveness | Approximate cost | Results timeline | Best for |
|---|---|---|---|---|---|
| DIY swab kit | Surface layer only; no numeric reading | Non-destructive | $10–$40 | Minutes | Quick preliminary screen |
| XRF analysis | Detects lead through multiple layers; numeric reading | Non-destructive | $300–$600+ per visit | Same day | Whole-house mapping, pre-renovation |
| Paint-chip lab analysis | Definitive for sampled area; quantitative | Destructive (small chip removed) | — | 1–5 business days | Confirming specific surfaces, legal documentation |
| Full risk assessment | Paint, dust, and soil; identifies active hazards | Minimally destructive | $400–$800+ | 1–2 weeks for report | Families with children, pre-purchase, post-renovation |
Handheld XRF analyzers are the tool most certified inspectors use for whole-house scans. XRF sends X-ray energy into the paint surface and measures the fluorescence that lead emits in response. Because it reads through all paint layers simultaneously, it can detect a buried lead layer without removing any material. Results are numeric (in milligrams of lead per square centimeter) and available on the spot. The main limitation is equipment cost, which is why XRF is a professional tool rather than a consumer one.
Paint-chip sampling is the most definitive method for a specific surface. A small chip is collected, sent to a National Lead Laboratory Accreditation Program (NLLAP) recognized lab, and analyzed. The result is a precise lead concentration. The drawback is that it only tells you about the exact spot sampled.
4. How to read your test results and what to do next
A positive result from any test method means lead-based paint is confirmed on that surface. What you do next depends on the surface’s condition and what you plan to do with it.

If the paint is intact and you are not planning to disturb it, the immediate risk is low. The priority is monitoring: check the surface every few months for signs of deterioration and keep children away from it. If the paint is already deteriorating or you are planning renovation work on that surface, a positive result requires lead-safe work practices at minimum, and often professional remediation.
A negative DIY result needs careful interpretation. It means lead was not detected at the surface layer in that specific spot. It does not mean the surface is lead-free at depth. If you are planning to sand, strip, or otherwise disturb the surface, a negative swab result is not sufficient clearance. Commission an XRF scan or paint-chip lab analysis to confirm.
Pro Tip: When collecting a paint-chip sample yourself for lab submission, use a clean utility knife and collect chips from multiple paint layers down to the substrate. A sample that only captures the top coat may miss the lead-containing layer entirely, producing a false negative.
Inconclusive or borderline results, where a swab shows a faint color change, should be treated as positive for planning purposes. The cost of assuming lead is present is a more careful work protocol. The cost of assuming it is absent and being wrong is hazardous dust exposure.
5. Immediate steps if you suspect lead paint or get a positive result
Act on these in order. Speed matters because lead dust settles on surfaces and gets tracked through the home.
- Stop all work immediately. Put down tools and do not continue sanding, scraping, or demolishing the surface.
- Seal the area. Close doors and block vents to prevent dust from spreading to other rooms.
- Remove children and pregnant people from the area and keep them out until the area has been professionally cleaned and cleared.
- Do not dry-sweep or use a regular vacuum. Both spread fine lead dust into the air. Use wet-cleaning methods and a HEPA-filter vacuum only.
- Seal any actively peeling paint with heavy-duty plastic sheeting and painter’s tape as a temporary measure while you arrange professional help.
- Call a certified lead-safe contractor or your local health department for guidance on cleanup and next steps.
“Even after a typical renovation cleanup, dangerous levels of lead dust can remain. Jobs such as demolition, window replacement, and opening walls can release accumulated lead dust throughout the home.”
— EPA Steps to Lead Safe Renovation, Repair and Painting
Children and pregnant people face the highest health risks from lead exposure. If you suspect a child has been exposed, contact a healthcare provider about blood lead testing. Blood lead level is the only definitive measure of actual exposure.
6. When to hire a certified professional and how to vet them
Some situations make professional help non-negotiable rather than optional.
Hire a certified inspector or risk assessor when:
- You are planning any renovation that disturbs painted surfaces in a pre-1978 home
- A DIY test returns positive
- Children under six or pregnant people live in the home
- You are buying or selling a pre-1978 property
- You see extensive paint deterioration across multiple surfaces
“Under the RRP rule, renovators must either assume lead is present and use lead-safe practices, or use EPA-recognized test kits or lab analysis to document that regulated lead-based paint will not be disturbed.”
— EPA Lead Test Kits
| Credential to verify | What it means | How to check |
|---|---|---|
| EPA RRP certification | Contractor trained in lead-safe renovation practices | Ask for certificate; verify at EPA’s contractor search |
| State/county lead license | Required in many states beyond federal RRP | Check your state health department website |
| NLLAP-recognized lab | Lab meets EPA standards for lead analysis | EPA maintains a searchable list of accredited labs |
| Proof of insurance | Covers lead-related liability | Request certificate of insurance before signing |
Practical questions to ask any contractor before hiring: How many surfaces will you sample? What does the written report include? What is your cleanup protocol after the job? Do you carry records for three years as required under RRP? A contractor who cannot answer these clearly is a contractor to avoid.
7. Typical costs and timelines for testing and remediation
Budget expectations vary widely based on home size, number of surfaces, and the extent of deterioration.
Testing costs (approximate):
- DIY swab kit: $10–$40 per kit
- Single-surface professional test (paint chip plus lab): $50–$150 including lab fees
- Whole-house XRF inspection: $300–$600 for a typical single-family home
- Full risk assessment (paint, dust, soil): $400–$800 or more
Timelines:
- DIY swab: results in minutes
- XRF inspection: same-day results, written report within a few days
- Paint-chip lab analysis: 1–5 business days depending on the lab
- Full risk assessment report: 1–2 weeks
- Abatement or encapsulation project: days to several weeks depending on scope
Factors that push costs up include larger homes with many painted surfaces, the presence of lead-contaminated soil around the exterior (common near older painted porches and window wells), and the need for clearance testing after remediation. Clearance testing, which confirms that dust levels have dropped below EPA action levels after work is complete, adds cost but is the only way to verify the job was done safely.
8. Safe remediation options after a positive test
A positive test result does not automatically mean full abatement. There are several approaches, and the right one depends on the surface condition, your renovation plans, and who lives in the home.
| Remediation method | What it involves | Best for | Key limitation |
|---|---|---|---|
| Encapsulation | Applying a specially formulated coating over intact lead paint | Stable surfaces not subject to friction or impact | Fails if underlying paint deteriorates; not for friction surfaces |
| Enclosure | Covering surfaces with new drywall, paneling, or trim | Large flat surfaces like walls | Does not remove lead; future renovation must account for it |
| Component replacement | Removing and replacing windows, doors, or trim | Friction surfaces with confirmed lead | Higher cost; generates lead-contaminated debris requiring proper disposal |
| Professional abatement | Removal or permanent control of lead paint by a certified abatement contractor | Extensive deterioration, high-risk households | Most expensive; requires clearance testing afterward |
DIY abatement, meaning sanding, heat-stripping, or chemical stripping of lead paint without proper controls, is one of the most hazardous things a homeowner can do. Sanding lead paint instantly creates fine airborne particles that settle throughout the home and remain hazardous long after the work stops. Any paint removal on a confirmed lead surface must follow EPA lead-safe work practices or be handled by a certified abatement contractor.
After any remediation work, clearance testing by an independent certified inspector confirms that settled dust levels meet EPA standards. Do not skip this step, especially when children live in the home.
9. Common myths about lead paint, corrected
Myth: Vinegar or other household solutions can detect lead.
False. Household chemicals do not reliably detect lead in paint. The only recognized methods are EPA-approved swab kits, XRF analysis, and accredited lab testing. Using an unproven method and getting a “negative” result can create a dangerous false sense of security.
Myth: If lead paint has been painted over, it is no longer a hazard.
Painted-over lead is lower risk only as long as the covering layers stay intact. The moment you sand, drill, or scrape through those layers during a renovation, you expose the lead-containing layer and generate hazardous dust. Many homeowners discover this the hard way mid-project.
Myth: Accidental sanding is a minor issue you can clean up yourself.
Accidental sanding of lead paint can create hazardous lead-contaminated dust almost instantly. The correct response is to stop work immediately, seal the area, and consult a lead-safe professional before attempting any cleanup. A regular vacuum and a damp cloth are not adequate.
Myth: You can tell lead paint by its appearance.
You cannot. Lead paint looks identical to non-lead paint. Age and location are clues; appearance is not. The only way to confirm lead content is through recognized testing.
Key takeaways
Homes built before 1978 should be treated as potentially containing lead-based paint until a certified test proves otherwise, and any renovation that disturbs painted surfaces requires lead-safe practices regardless of test results.
| Point | Details |
|---|---|
| Age is the primary indicator | EPA data shows 87% of homes built before 1940 contain lead paint, and 24% of homes built between 1960 and 1978 do as well. |
| DIY kits screen, not confirm | Swab kits detect surface-layer lead only; a negative result does not clear deeper paint layers. |
| Inspection vs risk assessment | An inspection maps lead locations; a risk assessment identifies active hazards and recommends actions. |
| Stop work if you disturb suspect paint | Seal the area, use wet cleaning and HEPA vacuums, and call a certified professional before continuing. |
| Clearance testing is the final step | After any remediation, independent clearance testing confirms dust levels meet EPA standards. |
The trade-off most homeowners get wrong
Most people approach lead paint as a binary: either it is a crisis requiring full abatement, or it is something they can ignore. The reality sits in a much more practical middle ground, and where you land on that spectrum should depend almost entirely on who lives in your home and what work you are planning.
If you have no children under six, no pregnant occupants, and you are not planning renovation work, intact lead paint in a pre-1978 home is a monitoring situation, not an emergency. Check it periodically, keep the surfaces clean, and document what you know. That documentation matters more than most homeowners realize: federal law requires sellers to disclose known lead paint hazards, and having a professional inspection report on file protects you at resale and limits liability.
The calculation shifts the moment a renovation enters the picture. Even a small job like replacing a window in a pre-1978 home can generate enough lead dust to contaminate an entire floor of the house. Professional painters and renovators who work on older homes regularly adopt a presumption of lead on any pre-1978 surface, which means they follow lead-safe practices on every job without waiting for a test result. That is the conservative approach, and it is the right one when the cost of being wrong is a child’s blood lead level.
If you are weighing DIY screening against a professional inspection, the deciding factor is not cost. It is what you plan to do with the result. A DIY screen that comes back negative gives you very little certainty if renovation work is coming. A certified XRF inspection gives you a documented, surface-by-surface map you can hand to any contractor and use in any disclosure. Spend the money on the test that actually answers the question you need answered.
Useful sources and where to find certified help
These are the primary U.S. authorities on lead paint testing, safety, and remediation. Use them to find certified inspectors, recognized labs, and local assistance programs.
| Resource | What it provides | Contact / URL |
|---|---|---|
| EPA Lead Program | Definitions of inspection vs risk assessment; certified contractor search; RRP rule guidance | epa.gov/lead |
| EPA Hotline | Free guidance on testing, certified professionals, and local programs | 1-800-424-LEAD |
| HUD Lead Hazard Control | Guidelines for lead-based paint inspection in housing; grant programs for low-income households | hud.gov/program_offices/healthy_homes |
| CDC Lead Prevention | Health risk information; guidance on blood lead testing for children | cdc.gov/lead-prevention |
| EPA NLLAP Lab List | Searchable list of accredited labs for paint-chip and dust analysis | Available through epa.gov/lead |
| State/local health department | Local certified inspector lists, financial assistance programs, and emergency guidance | Search “[your state] lead paint health department” |
This article provides general information about lead paint hazards and testing options. It is not a substitute for professional inspection, medical advice, or legal counsel. Confirm current standards and requirements with the EPA, your state health department, or a qualified certified professional before making decisions about your home.
Recommended