
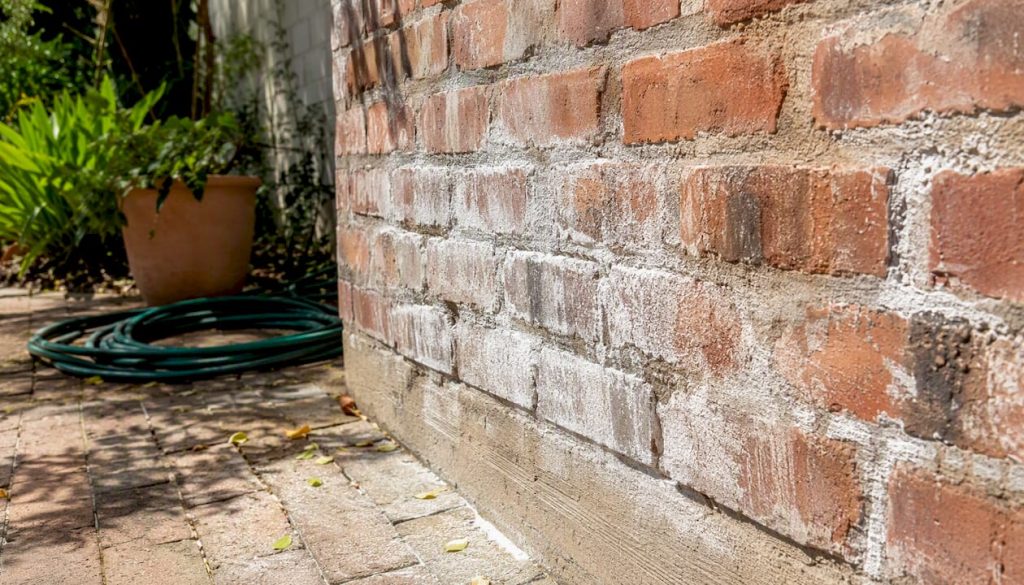
That white, chalky powder on your wall is called efflorescence, and the single most important thing you can do right now is stop adding moisture to the area. Don’t wet-scrub it, don’t paint over it, and don’t seal it with an impermeable coating. Always use breathable repairs and finishes, especially if recurring deposits or moisture history are present. Efflorescence forms when water moves through masonry, dissolves soluble salts inside the wall, and deposits them on the surface as it evaporates. The deposit itself is harmless, but it tells you water is moving through your wall, and that’s the problem worth solving.
Run these quick checks before you do anything else:
- Wipe test: Dampen a cloth and wipe the deposit. If it disappears and reappears once the wall dries, it’s efflorescence. Mold and mildew don’t dissolve that easily. Nitterhouse Masonry confirms this simple moisture test is the fastest way to distinguish salts from other deposits.
- Pinch test: Rub the powder between your fingers. Efflorescence feels gritty or crystalline. Mold feels slimy or fuzzy and won’t crumble to dust.
- Visual check: Look for the moisture source above or beside the deposit — a leaking gutter, a cracked sill, soil banked against the wall, or a missing flashing.
Pro Tip: Don’t wet-clean or paint over salts while the wall is still damp. Adding water to an already-wet wall dissolves more salts and drives them deeper, so the efflorescence comes back stronger once the surface dries.
Key takeaways
Efflorescence is a moisture problem first and a cosmetic problem second — fix the water source, clean when dry, and always use breathable finishes. For walls with any moisture history or recurring deposits, breathable repairs and coatings are essential to prevent internal damage.
| Point | Details |
|---|---|
| Diagnose before cleaning | Run the pinch test and wipe test to confirm salt deposits before applying any cleaner. |
| Fix the moisture source first | Cleaning without addressing drainage, flashings, or leaks guarantees the deposits return. |
| Clean dry, in warm weather | Dry brush first; progress to proprietary cleaners only if needed; avoid wet-cleaning in cold conditions. |
| Use breathable finishes | Salt-blocking primer plus a breathable masonry paint prevents rebound and coating failure. |
| Capeapexpainters’ approach | Surface-preparation-first painting with damp diagnosis before any new coating is applied |
Table of Contents
- Why do efflorescence walls form in the first place?
- Where you’re most likely to find salt deposits on walls
- How to tell efflorescence apart from mold, paint failure, or rising damp
- How to prevent efflorescence: fix the water, then fix the wall
- Step-by-step removal: from dry brushing to professional-strength cleaners
- Special guidance for efflorescence on interior walls and plaster
- When efflorescence signals a bigger problem
- Expert guidance: trace the moisture path, favour breathable repairs
- Why breathable repairs beat waterproofing every time
- Capeapexpainters: surface-prep-first painting for damp-affected walls
- Sources
Why do efflorescence walls form in the first place?
Three conditions must exist simultaneously: soluble salts in the masonry, water to dissolve and carry them, and a path to the surface where evaporation can deposit them. Remove any one of the three and efflorescence stops. The Portland Cement Association’s IS239 technical guide identifies these as the core causes, and every practical fix maps back to eliminating at least one of them.
Capillary action is the main transport mechanism. Water wicks through tiny pores in brick, concrete, or mortar, carrying dissolved salts with it. When the water reaches the surface and evaporates, the salts crystallise and stay behind. Hydrostatic pressure from saturated soil or a high water table pushes this process harder, which is why basement walls and below-grade foundations are particularly prone.
Salt sources are more varied than most homeowners expect. Portland cement and mortar naturally contain calcium, sodium, and potassium compounds. Groundwater carries sulfates and chlorides from soil. Road de-icing salts splash onto walls and soak in. Older buildings accumulate salts from decades of chimney soot, historical lime washes, and contaminated fill. Any of these can feed efflorescence if water is present.
Seasonality matters too. Cold, slow-drying conditions in winter mean water lingers in the wall longer, giving it more time to dissolve and transport salts. IS239 notes that certain alkali carbonates can also saponify paint coatings, causing them to blister and peel, which is why efflorescence and paint failure often appear together on the same wall.
Where you’re most likely to find salt deposits on walls
Efflorescence shows up on almost any masonry surface, but some materials and locations are far more vulnerable than others.
Most common surfaces:
- Brick and clay block (especially older, more porous units)
- Concrete and cinder block
- Stucco and cement render
- Lime or cement plaster over masonry
- Some natural stone, particularly sandstone and limestone
Typical locations:
- Exterior walls within 18 inches of grade, where soil moisture is constant
- Basement walls, particularly at floor-to-wall joints
- Window sills and lintels where water pools
- Parapets and retaining walls exposed to rain from above and below
- Poorly flashed joints at roof-to-wall intersections
- Newly constructed masonry in the first one to two years
Color and finish affect how visible the deposits are. White powder shows up starkly on dark brick or charcoal render, while light-colored walls can hide early-stage deposits until they’re quite thick. New construction often shows heavy efflorescence in the first season simply because construction water is still working its way out of the masonry.
Pro Tip: Inspect walls after a dry spell of several days, not after rain. A wall that looks damp after rain may show false positives. You want to see the dry crystalline deposit clearly before deciding on a treatment.
How to tell efflorescence apart from mold, paint failure, or rising damp
Getting the diagnosis right before you treat anything saves money and prevents making the problem worse.
- Efflorescence vs. mold: Efflorescence is white to gray, powdery, and water-soluble. Mold is typically black, green, or brown, has a fuzzy or slimy texture, and smells musty. The InterNACHI inspector guidance notes that the pinch test and water solubility check are reliable enough for most homeowners, though inspectors flag that heavy efflorescence can sometimes mask underlying mold on the substrate behind it.
- Efflorescence vs. paint failure: Peeling or blistering paint can look similar from a distance. The difference is that efflorescence sits on the surface as a loose crystalline layer, while paint failure involves the coating itself lifting or bubbling. If you scrape the white material and find intact paint underneath, it’s likely efflorescence on top of the coating.
- Efflorescence vs. rising damp: This is where misdiagnosis is most common. Heritage specialists at the Lime Research Trust warn that many internal white salt deposits come from historical sources (chimney fires, old lime washes, contaminated fill) rather than active rising moisture. A wall can look wet from hygroscopic salts absorbing humidity from the air, even when there’s no rising damp at all.
A moisture meter is useful when you’re unsure whether the wall is genuinely wet or just salt-contaminated. Readings above 20% in masonry usually indicate active moisture movement. For anything involving structural concern or a heritage building, a lab analysis of the salt type can distinguish sulfates from chlorides and guide the right repair approach. For most residential cases, though, the visual and tactile tests above are sufficient.
The worst outcome from misdiagnosis is applying a waterproof, non-breathable coating to a salt-laden wall. The salts can’t escape, pressure builds behind the coating, and you get cryptoflorescence: internal crystallisation that physically breaks apart the masonry from within.
How to prevent efflorescence: fix the water, then fix the wall
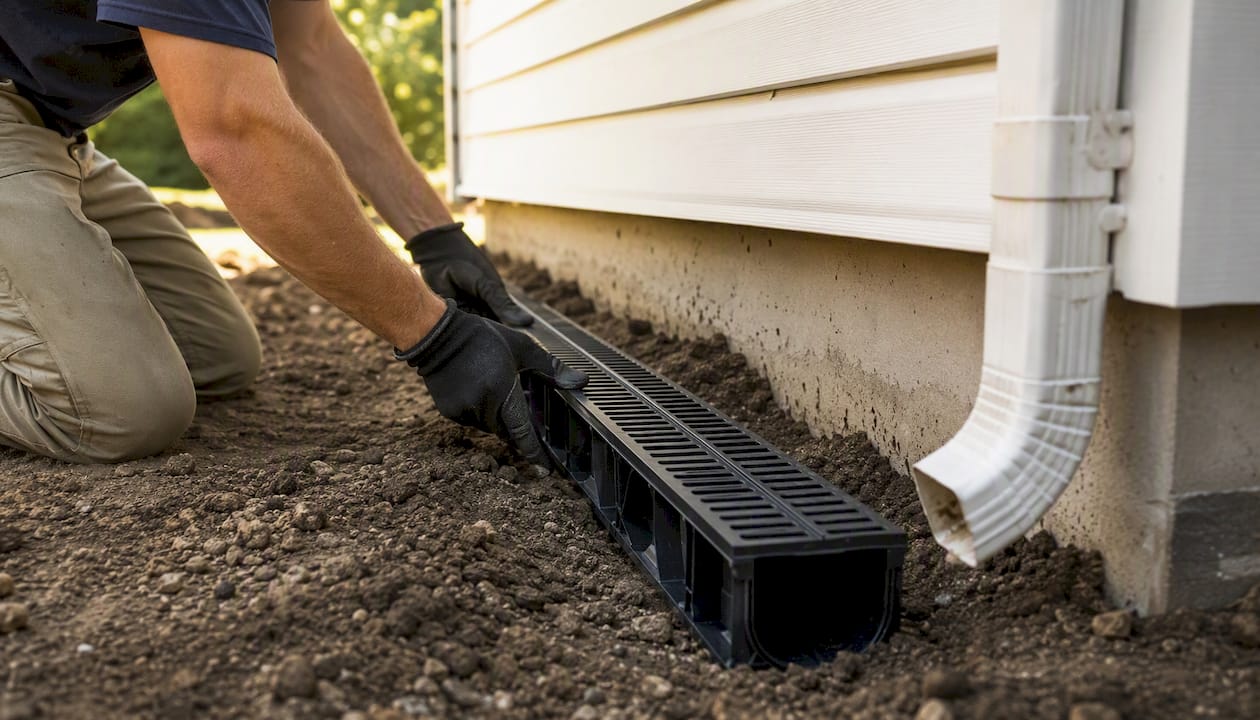
Prevention works at two levels: site drainage and construction detail. Address both and you cut the moisture supply that drives the whole process.
| Prevention measure | What it addresses | Priority |
|---|---|---|
| Regrade soil away from foundation | Reduces ground-contact moisture at base of walls | High |
| Clean and extend gutters/downspouts | Stops roof runoff saturating walls near grade | High |
| Install or repair through-wall flashing | Blocks capillary rise at sill and parapet level | High |
| Use washed sand and clean mixing water | Reduces salt content in new mortar and render | Medium |
| Apply breathable masonry sealer | Reduces water entry while allowing vapour escape | Medium |
| Use low-alkali cement or lime-based mortar | Lowers available salt in the masonry mix | Medium |
| Inspect and re-caulk joints annually | Closes entry points before winter rain | Low |

The Brick Industry Association’s technical note 23A recommends keeping masonry materials covered on site, using clean mixing water, and installing flashings at every horizontal surface exposed to weather. These construction-phase steps are far cheaper than remediation after the fact.
Breathable finishes deserve special attention. A siloxane-based water repellent, such as those in the PROSOCO Siloxane PD range, allows water vapour to escape while reducing liquid water penetration. This is the right choice for most exterior masonry. Avoid film-forming, impermeable coatings on walls with any known moisture history — they trap salts and accelerate damage.
Seasonal maintenance checklist: inspect flashings and caulk in early spring and late autumn, clear gutters before the rainy season, adjust irrigation so sprinklers don’t hit walls, and check basement drainage after heavy rain.
Step-by-step removal: from dry brushing to professional-strength cleaners
Work from the gentlest method upward. Adding unnecessary chemicals to a wall that only needs a stiff brush is a waste of time and money, and it can damage the masonry.
- Dry brush and vacuum. Use a stiff-bristled nylon or natural-fibre brush to loosen the deposit. Vacuum or sweep the debris away. For light, powdery efflorescence on a dry wall, this is often all you need.
- Low-pressure water rinse. If dry brushing leaves residue, rinse with clean water and a low-pressure hose. Do this in warm, dry weather so the wall can dry quickly. Avoid this step in cold or damp conditions — IS239 warns that wet-cleaning in cool weather can cause a rebound effect where salts return more heavily.
- Proprietary masonry cleaner. For stubborn or recurring deposits, PROSOCO recommends progressing to a purpose-made masonry cleaner before reaching for acid. Products in the PROSOCO Sure Klean range are formulated for specific masonry types and are safer than undiluted muriatic acid on most surfaces.
- Dilute acid (last resort, professional guidance advised). Diluted muriatic acid (hydrochloric acid) can dissolve calcium carbonate deposits that don’t respond to other methods. Use no stronger than a 1:10 acid-to-water ratio, always add acid to water (never the reverse), pre-wet the wall, apply, scrub lightly, and neutralise immediately with a dilute baking soda solution before rinsing thoroughly.
Test patch first. Before applying any cleaner to a visible area, test on a small, inconspicuous patch. Wait 24 hours to check for discoloration or surface damage.
| Deposit type | Recommended method | Notes |
|---|---|---|
| Calcium carbonate (white, hard crust) | Dilute acid or proprietary carbonate cleaner | Pre-wet wall; neutralise after |
| Sodium/potassium sulfates (fluffy, white) | Dry brush, then water rinse | Avoid acid — it can worsen sulfate deposits |
| Calcium sulfate (hard, white) | Proprietary cleaner | Acid has limited effect |
| General mixed salts | Dry brush → rinse → proprietary cleaner | Follow progression; test patch first |
Post-cleaning steps: Rinse the wall thoroughly with clean water. Allow a minimum of 48–72 hours drying time before applying any primer or paint. IndoorHumidity’s removal guide recommends this drying window to avoid trapping residual moisture under a new coating.
Pro Tip: Wear chemical-resistant gloves, eye protection, and a respirator when using acid cleaners. Never mix acid with bleach or other cleaners. Work in sections and keep a bucket of neutralising solution (baking soda and water) within arm’s reach.
Special guidance for efflorescence on interior walls and plaster
Interior efflorescence, particularly on basement walls or plaster over masonry, needs a stricter sequence because you’re working in an occupied space and the finish materials are more sensitive.
The correct order matters:
- Fix the exterior moisture source first. Interior cleaning is pointless if water is still entering from outside. Check gutters, grading, window wells, and any plumbing penetrations.
- Improve ventilation if condensation is contributing. A dehumidifier running in a basement for two to four weeks can reveal whether the moisture is coming from inside (condensation) or outside (penetration).
- Clean the salt deposits using dry brushing and, if needed, a dilute vinegar solution for light deposits on plaster. Avoid strong acid on lime plaster — it damages the binder.
- Allow the wall to dry fully. In a basement, this can take several weeks after fixing the source.
- Apply a salt-blocking primer before repainting. Products in this category (ask for a “salt-inhibiting” or “alkali-resistant” primer at your paint supplier) create a barrier that prevents residual salts from bleeding through the finish coat. Sherwin-Williams offers alkali-resistant primer options suited to masonry and plaster substrates.
- Finish with a breathable masonry paint. Avoid standard vinyl emulsions on masonry — they trap moisture. Ask specifically for a mineral or silicate-based paint, or a masonry-specific breathable emulsion.
For salt-contaminated plaster, surface cleaning alone often isn’t enough. If the plaster is soft, crumbling, or shows tide marks, replastering with a compatible, breathable mix is the right call. Patching over salt-damaged plaster with standard gypsum board compound will fail within months.
When efflorescence signals a bigger problem
Most first-time efflorescence on a new wall or after a wet winter is temporary. It often clears on its own once the construction moisture works out. Recurring deposits are a different story.
Red flags that point to a professional repair:
- Deposits return within weeks of cleaning
- Masonry is spalling, crumbling, or showing cracks alongside the deposits
- Damp patches track with rainfall and don’t dry out between events
- Large patches near the foundation or at floor level
- White deposits accompanied by rust staining (indicates reinforcement corrosion)
- Any sign of structural movement (stepped cracks, displaced brickwork)
Typical professional services for persistent efflorescence include diagnostic moisture tracing, structural masonry repair, through-wall flashing installation, damp-proof membrane injection, and controlled replastering with compatible materials. Professional damp testing uses calibrated moisture meters, carbide bomb tests, and sometimes salt analysis to distinguish between penetrating damp, rising damp, and condensation before recommending a fix.
Cost ranges vary widely by scope. A diagnostic inspection typically runs $150–$400. Surface cleaning and sealing for a single wall might cost $300–$800. Full damp-proofing with membrane installation or flashing replacement on a basement or foundation wall can run $2,000–$8,000 or more depending on access and extent. Get at least two quotes and ask each contractor to specify the moisture source they’re fixing, not just the surface treatment.
Questions to ask a contractor before they start:
- What is the moisture source, and how will you confirm it?
- Will you use breathable or non-breathable materials, and why?
- What warranty do you offer on the repair?
- Can you show me photos of similar completed jobs?
Have photos of the affected area, measurements of the patch size, and notes on when the deposits first appeared ready before any remote quote.
Expert guidance: trace the moisture path, favour breathable repairs
The most consistent advice from masonry specialists and heritage practitioners is this: treat efflorescence as a diagnostic tool, not just a cosmetic problem. Its location tells you where water is entering, and that’s what needs fixing.
The Lime Research Trust and heritage masonry specialists consistently recommend this sequence: diagnose first, remove the moisture source, then repair with breathable materials. In historic buildings with lime-based mortars, maintaining vapour permeability is especially critical — cement-based renders applied over lime masonry trap moisture and accelerate deterioration.
For new construction, the Brick Industry Association emphasises workmanship during the build: protect masonry from rain during construction, use clean materials, and install flashings correctly the first time. Efflorescence in a new wall is almost always a sign that one of these steps was skipped.
Pro Tip: When inspecting masonry for moisture issues, photograph the deposits from multiple angles and note the weather conditions in the days before. This documentation helps a professional trace the moisture path far faster than a visual inspection alone.
Why breathable repairs beat waterproofing every time
Most homeowners reach for a waterproof sealer when they see white powder on a wall. It feels logical: keep water out, stop the problem. The reality is the opposite, and it’s worth saying plainly.
Masonry breathes. Water vapour moves in and out constantly, and that movement is normal and manageable. When you apply an impermeable coating to a wall that still has a moisture source, you don’t stop the water — you redirect it. The moisture builds pressure behind the coating, carries salts with it, and when it finally breaks through (and it will), the damage is far worse than the original efflorescence. You get spalling, blistering paint, and in some cases, structural damage to the masonry itself.
The breathable-repair principle isn’t just a heritage-building concern. It applies to any masonry wall with a history of salt deposits. A siloxane water repellent that allows vapour transmission, a lime-compatible mortar for repointing, a mineral paint for the finish — these aren’t premium options for old buildings. They’re the correct materials for the job.
What I’d add from a painting and restoration perspective: the most expensive call-outs I’ve seen involve walls that were sealed with non-breathable products after a first round of efflorescence. The homeowner thought the problem was solved. Two winters later, the masonry was spalling and the coating had to be stripped entirely before any repair could start. The original fix cost less than $200. The remediation cost several thousand.
Document everything before you call a contractor. Photos of the deposits, the location, the surrounding details (gutters, flashings, soil level), and the dates you first noticed the problem. A good contractor can often narrow down the moisture source from photos alone, which saves time on-site and money on the quote.
Capeapexpainters: surface-prep-first painting for damp-affected walls
When efflorescence is the symptom and a freshly painted wall is the goal, the sequence matters more than the paint itself. Capeapexpainters brings an in-house team to every job in Cape Town, the Cape Winelands, and the Overberg, with a preparation-first approach that addresses damp and salt contamination before a single drop of paint goes on.

That means diagnosing the moisture source, cleaning and priming with compatible materials, and specifying coatings suited to the local climate — coastal salt air, UV exposure, and seasonal rain all factor into the product selection. No subcontractors, no shortcuts on prep, and no painting over a problem that will push through the finish coat in six months.
If your wall has recurring white powder, blistering paint, or damp patches that don’t resolve between seasons, get a quote from Capeapexpainters and have the moisture source assessed before any new coating goes on.
Sources
For readers who want deeper technical detail or product-specific guidance, these are the most reliable resources:
- What is efflorescence? — Nitterhouse Masonry
- Brick efflorescence removal and prevention tips — PROSOCO
- 23A – Efflorescence – Causes and Prevention — The Brick Industry Association (BIA) / GBI
- Lime
- Efflorescence on Walls: Causes & How to Remove It — IndoorHumidity
- Efflorescence for Inspectors — InterNACHI
Regional variation matters. Cleaning products, building codes, and contractor licensing requirements differ by state. When in doubt about a structural repair or a heritage building, consult your local building official or a licensed masonry contractor before starting work. For Cape Town and surrounding areas, Capeapexpainters offers on-site assessments and can advise on the right materials for the local climate.