
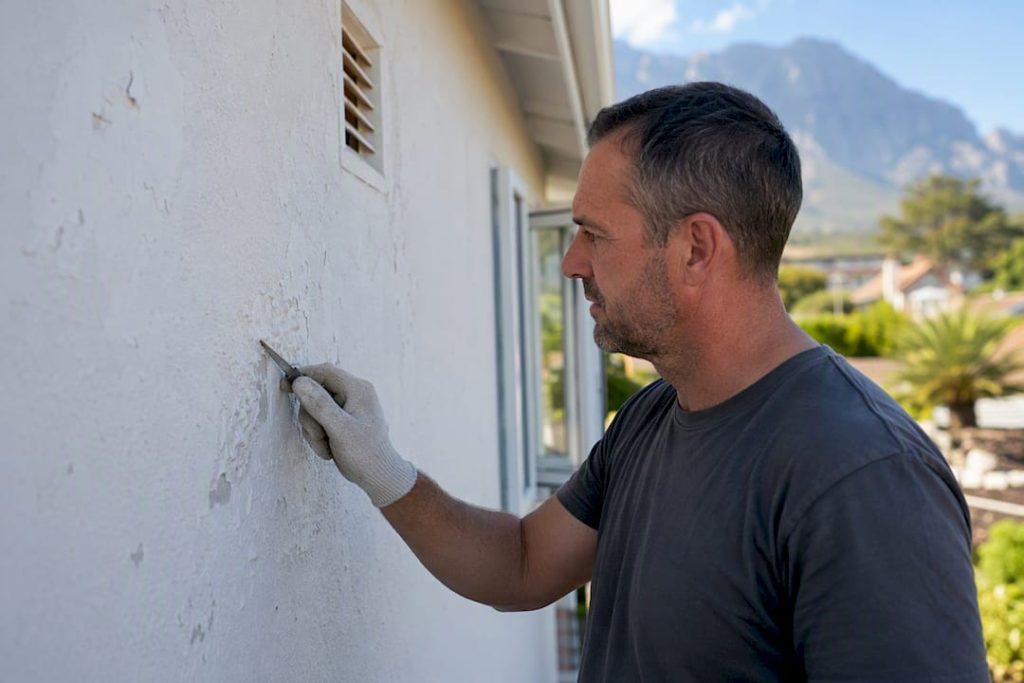
Blistering paint is a localized loss of adhesion where the paint film lifts away from the substrate in raised, dome-shaped bumps. Before you touch a single blister, you need to know whether it’s moisture-driven or heat and solvent-driven, because that answer decides your entire repair. Three quick checks tell you which:
- Timing: blisters that show up within hours or a couple of days usually point to heat or trapped solvent. Blisters that appear weeks or months after painting usually mean moisture.
- Location: clusters near gutters, plumbing lines, or south-facing walls hint at water intrusion or sun load.
- The pop test: lance a blister with a utility knife. A dry interior suggests heat or solvent; a wet interior means active moisture, and you should stop and trace the source before doing anything else.
If you find wet blisters, avoid repainting until the moisture issue is resolved. Dry blisters usually allow for a straightforward spot repair.
Key Takeaways
Fixing blistering paint permanently requires diagnosing the mechanism, heat, moisture, solvent, contamination, or osmotic salt, before any scraping or recoating begins.
| Point | Details |
|---|---|
| Pop test first | Lance a blister and check the underside; wet means moisture, dry means heat or solvent. |
| Match repair to cause | Spot-repair dry surface blisters, but fully remediate any moisture source before repainting. |
| Rinse twice after TSP | A single rinse leaves alkaline residue that can trigger new blisters months later. |
| Respect recoat windows | Painting too soon or too late after priming is a leading cause of repeat failures. |
| Call a pro for active moisture | Cape Apex Painters diagnoses moisture and osmotic damage in-house before specifying prep and paint. |
Table of Contents
- What blistering paint looks like and its five main types
- Why paint blisters: five mechanisms and their timing signatures
- How to diagnose blistering paint before you touch it
- Step-by-step repair for blistering paint
- Preventing blistering paint from coming back
- How long a blistering paint repair takes, and what drives the cost
- When to call a professional for blistering paint
- Get a proper diagnosis before your next repaint
- Frequently asked questions
- Sources
What blistering paint looks like and its five main types
Blistering shows up as smooth, rounded bumps under an intact paint film, unlike peeling, which curls and separates in flakes, or cracking, which splits along thin lines. The bump is trapped gas or liquid pushing the film off the surface. Not all blisters have the same root cause, though, and each type leaves its own clues:
- Heat/solar blistering appears fast on dark, sun-facing surfaces, often within a day of painting.
- Substrate moisture shows up over weeks as water vapor pushes through from behind, often near bathrooms or exterior walls with poor drainage.
- Solvent entrapment happens when a second coat traps solvent from the first before it fully evaporates.
- Surface contamination (dust, grease, chalk) creates small, scattered blisters wherever adhesion failed.
- Osmotic or salt-driven blistering pulls in water through soluble salts in masonry, common in coastal or damp-prone walls.
Why paint blisters: five mechanisms and their timing signatures
Paint blistering comes down to five recognized mechanisms: osmotic, substrate moisture, solvent entrapment, cathodic disbondment, and thermal expansion. Osmotic blistering pulls moisture through the film toward soluble salts trapped beneath it, a common issue on rendered or masonry walls near the coast. Substrate moisture works more directly: water vapor migrating from a leaking pipe, damp cavity, or poorly ventilated bathroom pushes the paint film off from below. Solvent entrapment happens during application, when a topcoat seals in solvent from an underlying layer that hasn’t fully cured. Cathodic disbondment is rarer in home painting and mostly affects coated metal exposed to an electrical current, such as buried pipe or tank coatings. Thermal expansion is the simplest: dark surfaces absorb heat, the substrate expands faster than the paint film, and adhesion fails.

Timing narrows the list fast. Hours-to-days points to heat or solvent. Weeks-to-months points to moisture or osmotic failure. Where the blisters cluster matters just as much. South-facing walls and dark trim suggest heat. Blisters behind gutters, near hose bibs, or close to plumbing chases suggest a water source.
Get the mechanism wrong and the fix won’t hold. Scrape and repaint over an active moisture leak and the new coat blisters again within a season, because the actual problem, water finding its way behind the film, never left.
How to diagnose blistering paint before you touch it
Work through this sequence before deciding on a repair:
- Note when the blisters appeared. Days after painting points to heat or solvent. Longer than a month points to moisture.
- Map the pattern. Are blisters isolated to one wall, one elevation, or scattered randomly? Isolated patterns near plumbing or gutters are a strong moisture signal.
- Lance a blister with a utility knife and inspect the underside. A wet or damp interior means moisture is active; dry means heat or trapped solvent.
- Check for a wider moisture problem with a pin-type or pinless moisture meter on the surrounding substrate, especially if you found dampness in step 3.
Stop immediately if the substrate feels wet to the touch, if you suspect a structural leak behind the wall, or if the home was built before 1978 and the failing paint could contain lead. Lead paint disturbed by scraping or sanding releases hazardous dust and needs specialist handling, not a DIY scrape session.
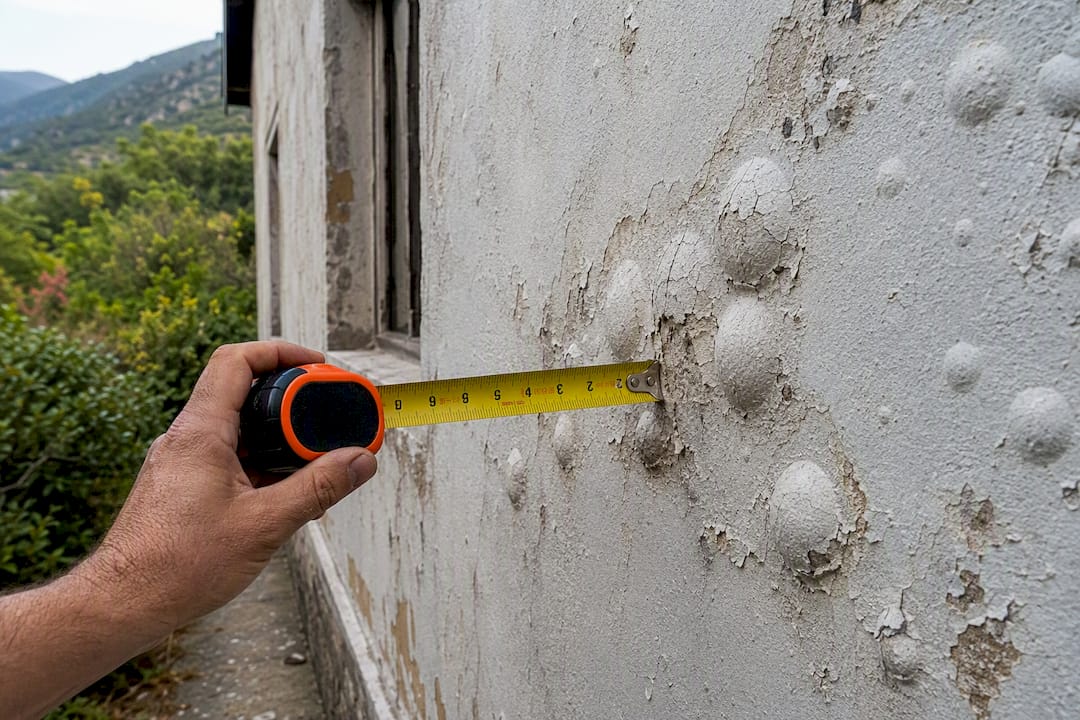
Pro Tip: Photograph each blister location with a tape measure in frame before you lance anything. If moisture turns out to be structural, that record becomes useful evidence for a contractor’s diagnosis later.
Step-by-step repair for blistering paint
Decide your scope first. Dry, isolated, surface-only blisters call for a spot repair. Anything wet, widespread, or tied to osmotic salt damage calls for a full strip and remediation, meaning you fix the moisture source before any paint goes back on.
For a spot repair:
- Lance and scrape away all loose, blistered paint film with a scraper or putty knife.
- Feather the edges with sandpaper so the repaired area blends into the surrounding sound paint.
- Wash the area with a trisodium phosphate (TSP) solution to strip grease, chalk, and contaminants.
- Rinse twice with clean water. One rinse often leaves alkaline residue behind that acts as a bond breaker and triggers a fresh round of soap blisters months later.
- Let the surface dry fully, ideally 24 to 48 hours depending on humidity.
- Prime the bare substrate with a primer suited to the surface (masonry sealer for osmotic salt issues, a stain-blocking primer for solvent or contamination failures).
- Recoat within the manufacturer’s stated recoat window, not before the primer has cured and not so late that it’s lost its bonding properties.
Checklist: scraper, 120 to 150 grit sandpaper, TSP, two buckets for rinsing, moisture meter, quality exterior or interior primer, matching topcoat.
Pro Tip: Never rush the recoat window. Painting over primer before it’s cured, or waiting so long that dust settles on it, is one of the most common reasons blisters come back within a year.
Preventing blistering paint from coming back
Most repeat blistering traces back to skipped prep, not bad paint. Before any brush touches the wall:
- Confirm the substrate reads dry on a moisture meter, not just dry to the touch.
- Clean and degrease fully, and remove chalking residue with a stiff brush or TSP wash.
- Choose a primer matched to the failure type, masonry sealer for salt-prone walls, stain blockers for solvent or tannin issues.
- Never paint in direct sun, on a hot substrate, or in high humidity; both accelerate the mechanisms behind blistering.
For ongoing maintenance, clear gutters twice a year, re-caulk window and door trim before winter rain, and run extractor fans or a dehumidifier in bathrooms and kitchens to control indoor humidity. In coastal or consistently damp spots, a breathable, moisture-tolerant coating outperforms a standard finish every time.
How long a blistering paint repair takes, and what drives the cost
A spot repair on a dry, isolated patch is usually a half-day to full-day job, including prep, priming, and topcoat. A full strip-and-remediate job runs several days to a couple of weeks once you factor in drying time after moisture repair.
Cost and effort scale with:
- Size of the affected area relative to the whole wall or roof.
- Whether moisture remediation is required, gutter repair, flashing, re-caulking, or plumbing fixes add labor before painting even starts.
- Substrate condition, rotted timber or crumbling render needs replacement, not just sanding.
- Drying and cure time, humid climates or dehumidifier use can add days to the schedule that homeowners rarely budget for.
When to call a professional for blistering paint
Some situations are worth handing to a painting contractor rather than tackling yourself:
- Blisters pop wet and you can’t identify or reach the moisture source.
- The affected area is large, structural, or on a roof or high wall.
- You suspect lead paint in a pre-1978 home.
- Salt or efflorescence is visible, pointing to osmotic damage that needs specialist treatment.
When you get quotes, ask what diagnostic steps are included. A proper quote should cover moisture testing, a written surface-prep plan, the specific primer and topcoat proposed, and a warranty on the finished work. Walk away from any quote that skips moisture diagnosis or promises to “just repaint it” without addressing prep, that’s the exact shortcut that causes blisters to return within a season.
A note on getting the diagnosis right the first time
Most repeat blistering calls we see trace back to one thing: someone repainted before fixing the actual water or heat problem. Cape Apex Painters runs a preparation-first process on every job, using an in-house team rather than subcontractors, across Cape Town, the Cape Winelands, and the Overberg. Properly diagnosed and prepped remedial work holds up, and it’s backed accordingly.
Get a proper diagnosis before your next repaint
Cape Apex Painters is the alternative to guessing your way through a blister repair: instead of scraping and recoating over a problem that’s still active underneath, our in-house team diagnoses whether you’re dealing with moisture, heat, solvent entrapment, or salt-driven osmotic damage before any prep work begins.

Our scope covers a full diagnostic assessment, moisture testing where blisters run wet, complete surface preparation (scraping, TSP washing, priming), and a warranty-backed topcoat matched to your climate exposure, whether that’s direct sun, coastal salt air, or persistent damp. If you’re weighing up interior doors or trim as part of the same project, our partners at One Day Doors & Closets have useful guidance on prepping and finishing those surfaces too. For walls, roofs, and exteriors showing blistering, request a site assessment from Cape Apex Painters and get a quote built around what’s actually causing the failure, not just a fresh coat over it.
Frequently asked questions
What does blistering paint mean?
It means the paint film has lost adhesion and lifted off the substrate in a dome shape, usually from trapped heat, moisture, or solvent underneath.
Can I just sand down and repaint over blistering paint?
Only if the blisters are dry and heat or solvent-driven. If they’re wet, sanding and repainting without fixing the moisture source causes the same failure again.
Is blistering paint a sign of a bigger problem?
It can be. Wet blisters, especially in clusters near plumbing or gutters, often point to an active leak or drainage issue that needs attention beyond the paint itself.
How do I stop paint from bubbling again after I fix it?
Rinse twice after cleaning with TSP, prime bare substrate correctly, and respect the recoat window on your primer, then address whatever let moisture or heat in in the first place.
Sources
- Paint Blistering: Causes, Diagnosis & Prevention
- Blistering – Sherwin-Williams
- Blistering paint problem solver (Behr Pro)