
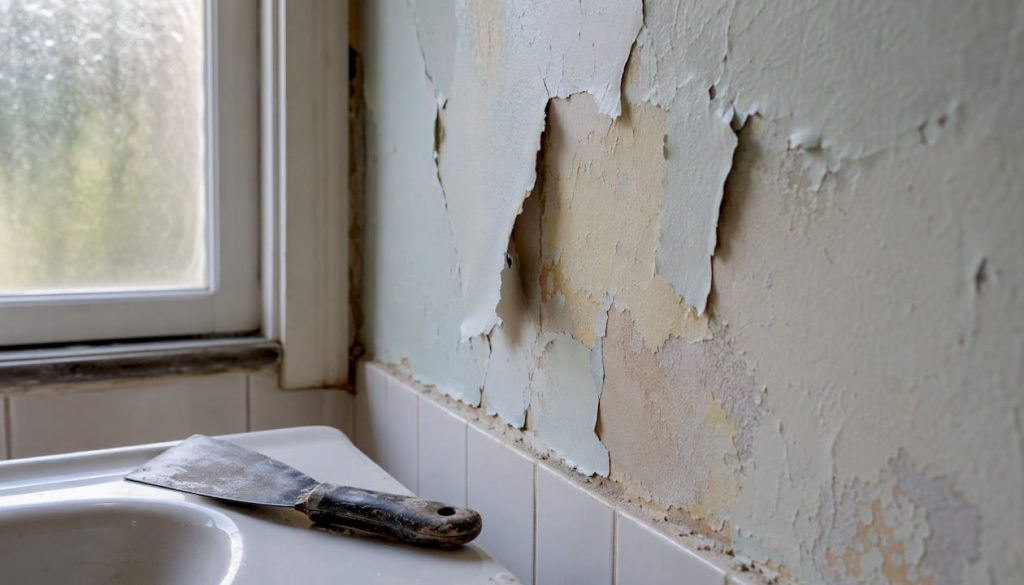
Bathroom paint peeling is almost always a moisture problem, a prep problem, or both. Warm, humid air from showers condenses on cooler walls and ceilings, works its way into the paint film, and breaks the bond between paint and substrate. The fix starts before you open a tin: address the moisture source first, remove every flake of failing paint, and only then prime and repaint with products rated for wet zones. According to Prominent Paints’ industry repair guideline, a properly executed bathroom paint job with correct prep and a moisture-blocking primer should last about 5–7 years. Peeling within a year is a clear signal that ventilation, surface prep, or product selection went wrong.
Immediate triage steps:
- Stop using the shower if you suspect a plumbing leak behind the wall.
- Switch on the extractor fan and check it actually exhausts outside, not into a ceiling cavity.
- Remove only the paint that is already loose; do not scrape into sound paint.
- Never paint over flaking or bubbling paint — you will trap moisture and accelerate the failure.
- If you see black or green mold, wear an N95 respirator and gloves before touching anything.
Table of Contents
- Why is your bathroom paint peeling? A diagnostic checklist
- Emergency fixes for small peeling areas
- Full repair workflow: from scrape to final coat
- Which primer and paint should you choose for a bathroom?
- How to prevent bathroom paint peeling for good
- Tools, materials, and what the job will cost
- When should you hire a professional painter or damp specialist?
- Key takeaways: how to stop bathroom paint peeling for good
- The advice most guides get backwards
- Persistent peeling? Cape Apex Painters fixes it at the source
- Sources
Why is your bathroom paint peeling? A diagnostic checklist
Reading the pattern of failure tells you most of what you need to know before you touch a scraper.
Visual signs and what they mean:
- Bubbling or blistering under intact paint: moisture is trapped between the paint film and the substrate, usually from condensation or a slow leak.
- Map-like flakes (cracked, alligator-skin pattern): the paint dried too fast, was applied over a chalky surface, or the wrong product was used.
- Soft, discolored, or crumbling drywall beneath the paint: water has saturated the substrate. This is beyond a cosmetic fix.
- Peeling only at the ceiling above the shower recess: almost always a ventilation or condensation issue. Warm shower steam rises and hits the coldest surface in the room.
- Peeling at the base of walls or skirting boards: water intrusion from below, often a plumbing leak or rising damp.
- Patchy spots mid-wall: localized leak, a cold spot in the wall, or a contaminated patch (old soap residue, silicone overspray).
Condensation tends to occur when surface temperatures drop below roughly 13°C (55°F), which is common on poorly insulated exterior walls or cold ceilings in winter. Touch the wall after a shower: if it is noticeably cold and wet, that surface is a condensation target regardless of how good the paint is.
Simple moisture checks you can do now:
- Smell the area. A musty or earthy odor points to mold in the substrate, not just surface mold.
- Press the drywall firmly. Any give or sponginess means the board has absorbed water.
- Use a pin-type or non-invasive moisture meter. Drywall core readings above 12% and plaster above 15% mean the substrate is too wet to paint.
Pro Tip: A cheap hygrometer placed in the bathroom for 24 hours tells you the peak relative humidity after a shower. That reading alone narrows the diagnosis faster than any visual inspection.
The decision rule is straightforward: if the substrate is dry and sound, the problem is paint choice or prep. If the substrate is wet, soft, or smells of mold, fix the moisture source before anything else. Painting over a wet wall is the single most reliable way to guarantee the new coat fails within months, as BobVila’s guide on peeling paint confirms.
Emergency fixes for small peeling areas
Some situations call for stabilizing a small patch today while you plan a full repair. Others do not — and knowing the difference saves you from making the problem worse.
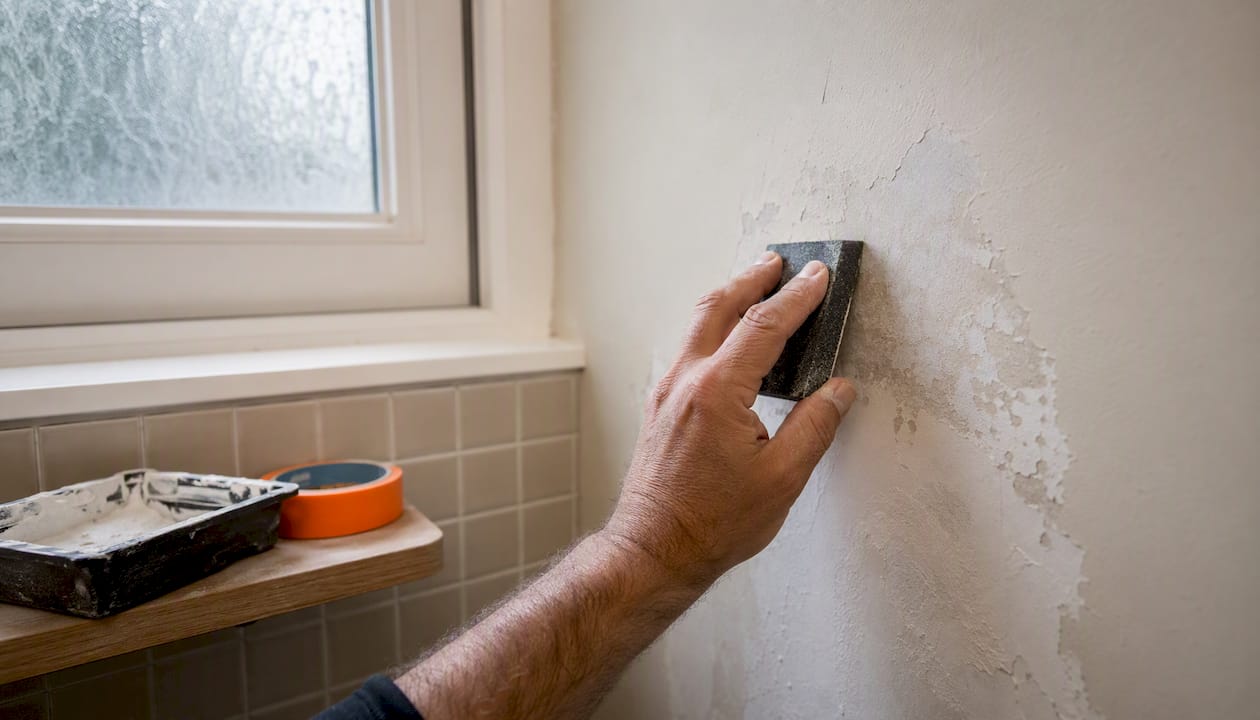
When a short-term patch is appropriate: the peeling area is smaller than roughly 30 cm across, the substrate beneath is dry and firm, and there is no active leak or spreading damp. If any of those conditions fail, stop and go straight to a full repair or call a professional.
Step-by-step emergency stabilization:
- Remove all loose paint by hand or with a flexible scraper. Do not force sound paint off; stop where the paint is still firmly bonded.
- Dry the exposed area with a fan or dehumidifier for at least 48 hours. Do not skip this step.
- If you see mold, apply a diluted bleach solution (one part bleach to three parts water), leave it for 10 minutes, then wipe clean. Wear gloves and an N95 mask, and keep the room ventilated.
- Apply a thin coat of a shellac-based primer or a bonding primer to the bare patch. This seals the substrate and gives the topcoat something to grip.
- Once the primer is dry (check the tin, typically 1–2 hours), apply a single coat of bathroom-rated satin or semi-gloss paint. Blend the edges into the surrounding paint as smoothly as possible.
When to skip the patch and call a pro:
- The damp or peeling is spreading between visits.
- The drywall or plaster feels soft anywhere near the patch.
- You have already patched the same spot twice.
- There is visible mold behind the paint film, not just on the surface.
Full repair workflow: from scrape to final coat
This is the process that actually fixes bathroom paint peeling for the long term, not just cosmetically. Follow it in sequence; skipping steps is where most DIY repairs fail.
- Fix the root cause first. Check the extractor fan, look for dripping pipes, and inspect grout and silicone seals. If active moisture exists, repair it before touching the paint.
- Remove all failing paint. Scrape back to a firm edge. Feather the transition with 80-grit sandpaper so there is no hard lip between the bare substrate and the surrounding paint. Sherwin-Williams’ repair guide is clear: never paint over loose or flaking paint.
- Repair the substrate. For ceiling repairs or any damp-prone area, use a setting-type joint compound (“hot mud”) rather than air-dry spackle. Hot mud chemically hardens and is far less likely to re-emulsify in a humid bathroom. For small wall patches, a pre-mixed vinyl spackle works on dry, stable drywall.
- Dry to moisture targets. Before priming, the drywall core should read below 12% on a moisture meter, and plaster below 15%. If readings are higher, run a dehumidifier and wait. Rushing this step is the most common reason a repair fails again.
- Sand and clean. Once the compound is hard, sand smooth with 120-grit, wipe with a damp cloth, and allow to dry fully.
- Prime the full field, not just the patch. Spot-priming leaves a sheen difference and risks adhesion failure at the edges. A full-field bonding primer, applied across the entire wall or ceiling surface, gives the topcoat a uniform base.
- Apply two topcoats. Use a satin or semi-gloss bathroom-rated paint. Allow the first coat to dry fully before the second (check the manufacturer’s recoat window, typically 2–4 hours for water-based paints).
- Wait before steam exposure. Allow 24–72 hours of cure time before running a hot shower, as recommended by Rapidrepair. Exposing partially cured paint to steam causes surfactant leaching and early bond failure.
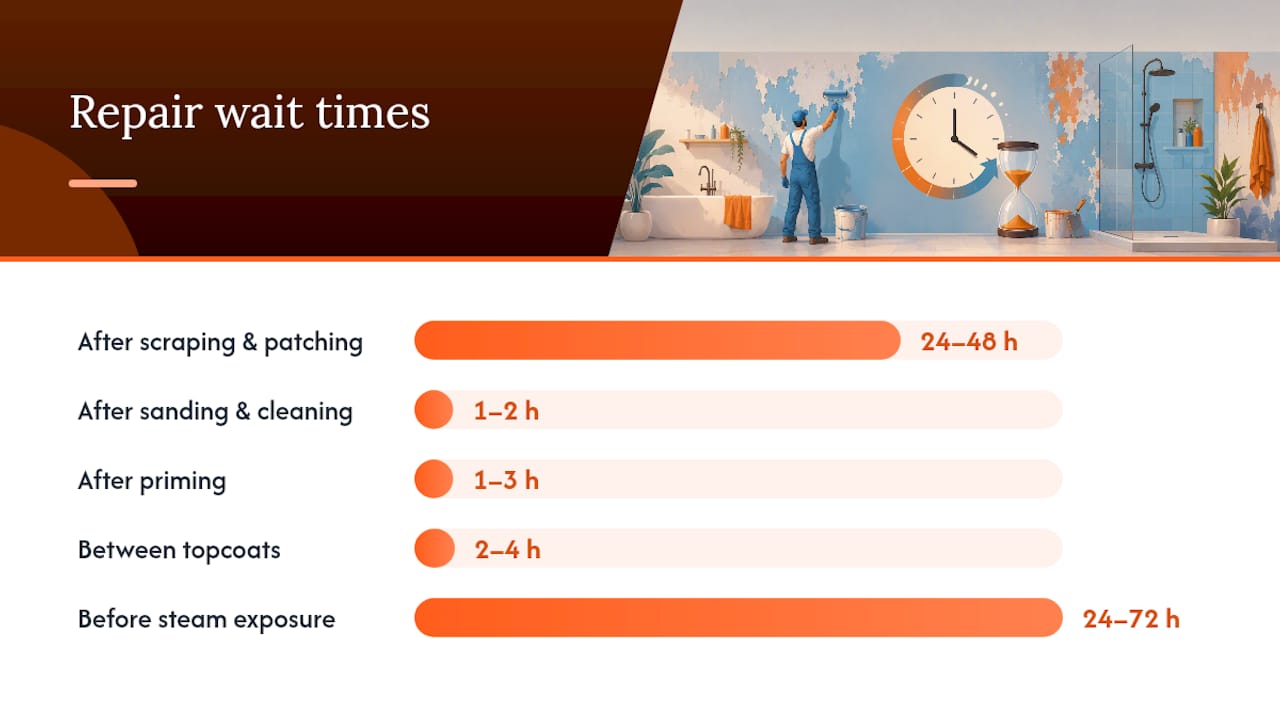
Repair timing at a glance:
| Stage | Typical wait time | Notes |
|---|---|---|
| After scraping and patching | 24–48 hours drying | Longer if substrate was wet; use dehumidifier |
| After sanding and cleaning | 1–2 hours | Surface must feel completely dry to touch |
| After priming | 1–3 hours before topcoat | Follow primer manufacturer’s recoat window |
| Between topcoats | 2–4 hours | Water-based paints; check tin for exact time |
| Before steam exposure | 24–72 hours after final coat | Critical for ceiling repairs above shower |
Which primer and paint should you choose for a bathroom?
The wrong product is one of the most common causes of premature paint failure in wet rooms. Here is what the labels actually mean and what to buy.
Primer types:
- Shellac-based primer (e.g., Zinsser BIN): the strongest stain and moisture blocker available in a rattle can or brush-on. Use it on water-stained ceilings, over mold-treated areas, or anywhere the substrate has been saturated. Solvent-based; ventilate well.
- Oil-based or alkyd bonding primer: excellent adhesion on glossy or previously painted surfaces. Good moisture resistance. Slower drying than water-based options.
- Water-based bonding primer: faster drying, lower odor, and adequate for most bathroom wall repairs where the substrate is dry and stable.
- Moisture-blocking or sealing primer: specifically formulated to lock in stains and prevent moisture migration. Use on ceilings above showers and on any area that has shown water marks.
Topcoat guidance:
- Satin finish: the standard recommendation for bathroom walls. Easier to clean than flat, less reflective than semi-gloss, and durable enough for most residential bathrooms.
- Semi-gloss: the better choice for ceilings above showers and for high-traffic bathrooms. More moisture-resistant and easier to wipe down.
- Flat or matte: avoid in bathrooms. Flat paints are porous, absorb moisture, and are the most common product-selection mistake behind early paint failure.
- Mildew-resistant formulations: these contain biocides that inhibit mold growth on the paint surface. They do not prevent mold in the substrate. If mold is already in the wall, treat it first; mildew-resistant paint is a maintenance tool, not a remediation tool.
What “mildew-resistant” does and does not mean: the label means the paint film itself resists surface mold growth under normal conditions. It does not mean the paint will hold on a wet substrate, and it does not replace proper ventilation or substrate treatment. This Old House’s guide to mold-resistant bathroom painting is explicit: clean with bleach solution, use a mildew-resistant primer, and apply two full coats with proper dry times between them.
Buying checklist for bathroom paint:
- Finish: satin minimum (semi-gloss for ceilings and high-humidity zones)
- Label: “bathroom,” “kitchen and bath,” or “moisture-resistant” on the tin
- Mildew-resistant additive: listed in the product description
- Primer: separate moisture-blocking or bonding primer, not a paint-and-primer-in-one for wet areas
A note on vapor barriers: a non-breathable topcoat applied over a substrate that still holds residual moisture will trap that moisture and accelerate failure. In retrofit situations where the wall may still be drying out, a breathable finish is the safer choice until the substrate is confirmed dry.
Safety note: shellac and alkyd primers contain volatile solvents. Use them only with the windows open, the extractor fan running, and no open flames nearby.
How to prevent bathroom paint peeling for good
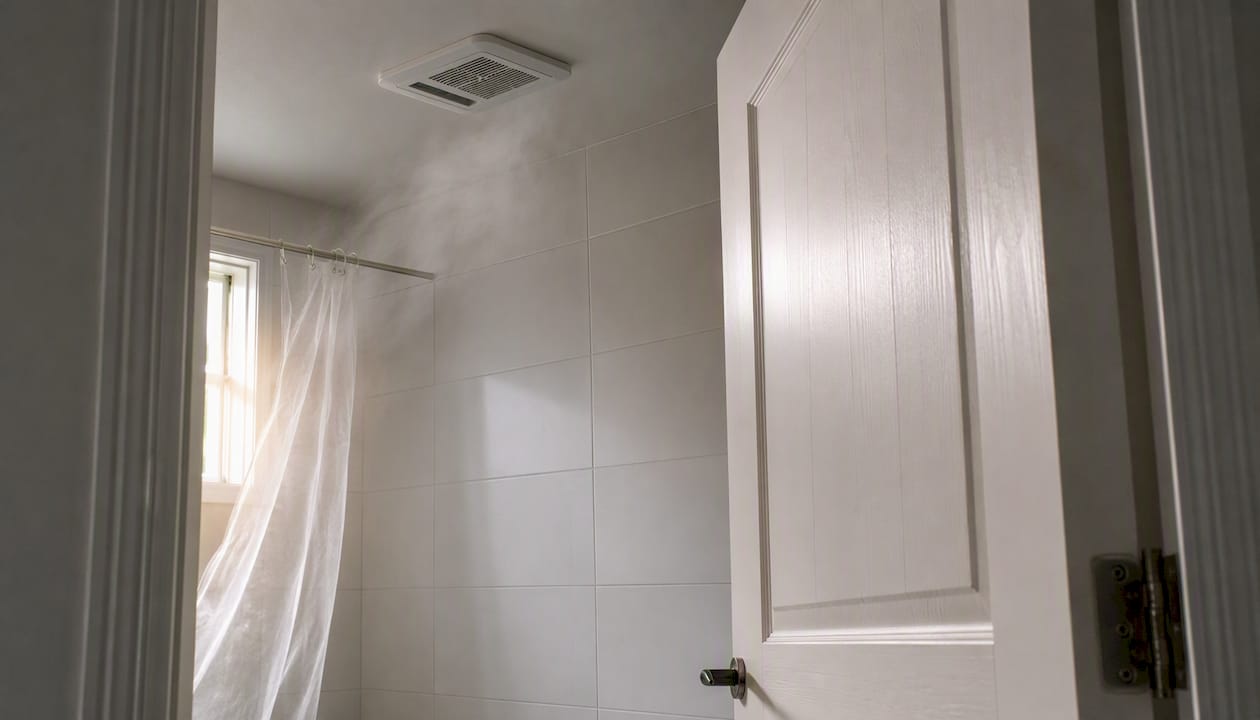
Ventilation is the single most effective prevention measure, and most bathrooms get it wrong in at least one of three ways: the fan is undersized, it vents into the ceiling cavity instead of outside, or it is switched off too soon.
Fan sizing and runtime:
- Size your fan at a minimum of 1 CFM per square foot of bathroom floor area. A 5 m² bathroom needs at least a 50 CFM fan.
- Run the fan for 20–30 minutes after every shower, not just while showering. Most of the moisture load hits the walls after the water stops.
- Check termination: the duct must exit through an exterior wall or roof cap, not into the attic or ceiling void. A fan venting into a ceiling space creates a condensation problem worse than no fan at all.
Daily habits that protect paint:
- Squeegee tiled walls after showering to remove surface water before it evaporates into the air.
- Open a window for 10 minutes after showering if the fan is marginal.
- Wipe visible condensation from walls and mirrors promptly.
- Leave the bathroom door open after showering to allow air exchange.
Simple upgrades worth doing:
- Fit a humidity-sensor timer switch. It runs the fan automatically until the RH drops to a set threshold, removing the human variable entirely.
- Replace an undersized or noisy fan with a quiet, higher-CFM model. Quiet fans get used more consistently.
- Position vents to avoid dead-air zones: a vent placed directly above the shower recess captures steam at the source rather than pulling it across the entire ceiling.
Pro Tip: Ventilation removes airborne vapor, but it cannot extract moisture that has already condensed into the wall or ceiling. If the substrate is already wet, a fan will not dry it out fast enough to prevent paint failure. In that situation, a dehumidifier running in the closed bathroom for 48–72 hours is more effective than any fan.
When building-envelope issues are the cause, such as an uninsulated exterior wall creating a persistent cold spot, or moisture migrating from an adjacent wet room, ventilation alone will not solve the problem. Insulation upgrades or a vapour-barrier membrane behind the wall lining are the correct fix. Bathroom door material also affects moisture migration: solid-core or moisture-resistant doors reduce the amount of humid air that escapes into adjacent spaces, which matters for bathroom door selection in renovation planning.
Tools, materials, and what the job will cost
Essential tools:
- Flexible scraper (75 mm and 150 mm blades)
- Sandpaper: 80-grit for feathering, 120-grit for finishing compound
- Putty knife for applying compound
- Pin-type moisture meter
- Hygrometer (to monitor RH during drying)
- Brushes and short-nap roller (10 mm nap for smooth walls, 13 mm for textured)
- PPE: N95 respirator, safety glasses, nitrile gloves
- Drop cloths and masking tape
Consumables and materials:
- Setting-type joint compound for ceiling or damp-prone repairs
- Pre-mixed spackle for small, dry wall patches
- Shellac-based or bonding primer
- Bathroom-rated satin or semi-gloss topcoat
- Bleach solution for mold treatment (1:3 bleach to water)
- Tack cloth or damp rag for cleaning before priming
Approximate time per task:
- Scraping and prep: 1–3 hours depending on area
- Patching and drying: 24–48 hours (substrate drying is the longest stage)
- Sanding and cleaning: 30–60 minutes
- Priming: 1–2 hours application, 1–3 hours drying
- Two topcoats: 2–3 hours total application, 4–8 hours drying between coats
For a small patch repair, DIY materials typically run under a few hundred rand for primer, paint, and compound. A full bathroom repaint with proper prep, primer, and two topcoats will cost more in materials but is still manageable as a weekend project if the substrate is dry and sound. Renting a dustless orbital sander pays off on large areas where feathering by hand would take hours. A dehumidifier rental is worth the cost if the substrate is wet: it cuts drying time from days to 48 hours and reduces the risk of painting too soon.
When should you hire a professional painter or damp specialist?
Some bathroom paint failures are genuinely beyond DIY, and attempting them without the right tools or experience usually results in a third repair within a year.
Call a professional when:
- The paint has peeled in the same spot after two previous repairs.
- Your moisture meter reads above 12% on drywall or above 15% on plaster, and the reading is not dropping after 48 hours of dehumidification.
- The substrate is soft, crumbling, or separating from the wall structure.
- You find mold behind the paint film rather than on the surface.
- There is an active or suspected plumbing leak behind the wall.
- The peeling covers more than one wall or is spreading between visits.
What a professional does differently: a qualified painter or damp specialist will conduct a full moisture mapping assessment, not just a visual check. They carry calibrated moisture meters, thermal imaging cameras for locating cold spots and hidden leaks, and access to setting compounds and professional-grade primers that are not always available in retail quantities. Damp-proofing treatments applied by a professional are warranted in a way that a DIY patch is not.
What to expect from a quote: a thorough contractor will inspect the substrate before quoting, not after. The scope should include moisture readings, a description of the prep work, the specific primer and topcoat products to be used, and a timeline. Any quote that skips substrate assessment and goes straight to a paint price is a red flag.
Cape Apex Painters approaches every bathroom job with a prep-first diagnostic: moisture mapping before any coating is specified, in-house painters (no subcontractors), and product selection matched to the local climate conditions of Cape Town, the Cape Winelands, and the Overberg.
Key takeaways: how to stop bathroom paint peeling for good
Solving bathroom paint peeling permanently requires fixing the moisture source, drying the substrate to measurable targets, and repainting with a bathroom-rated primer and topcoat in the correct sequence.
| Point | Details |
|---|---|
| Ventilation first | Run the fan for 20–30 minutes after every shower; size it at minimum 1 CFM per square foot. |
| Remove all loose paint | Scrape back to a firm edge and feather with 80-grit before any patching or priming. |
| Dry to moisture targets | Drywall must read below 12% and plaster below 15% on a moisture meter before priming. |
| Prime the full field | Apply a bonding or moisture-blocking primer across the whole surface, not just the patched spot. |
| Use the right finish | Satin or semi-gloss mildew-resistant paint only; flat and matte paints fail in wet rooms. |
| Cape Apex Painters | For recurring failures or wet substrates, Cape Apex Painters offers prep-first diagnostic painting in Cape Town, the Cape Winelands, and the Overberg. |
If the problem recurs after a correct repair, revisit the “when to call a professional” triggers above — recurring failure almost always points to an unresolved moisture source, not a paint problem.
The advice most guides get backwards
Most articles on bathroom paint peeling open with a product recommendation. Buy this primer, use that semi-gloss, and you will be fine. The product matters, but it is the last decision you should make, not the first.
The real sequence is: diagnose the moisture source, measure the substrate, fix what is wet, then choose products. Skipping to the paint aisle while the wall is still damp is the reason so many bathrooms peel again within six months of a repair. The paint did not fail. The process did.
There is also a widespread misunderstanding about what mildew-resistant paint actually does. It inhibits mold growth on the paint film itself, under normal conditions. It does not waterproof the substrate, it does not compensate for a fan that vents into the ceiling cavity, and it does not stick to a wet wall any better than standard paint. Treating it as a cure-all is one of the most expensive mistakes a homeowner can make, because it delays the real fix.
The other thing most guides understate: ventilation is a system, not a switch. A fan that runs for three minutes and exhausts into the attic is worse than useless. Getting ventilation right, from fan sizing to termination to runtime, is the single intervention that protects paint for the full 5–7 year lifespan. Everything else is maintenance.
Persistent peeling? Cape Apex Painters fixes it at the source
Recurring bathroom paint failure almost always means the moisture source was never properly identified. Cape Apex Painters takes a different approach: every job starts with a moisture mapping assessment before a single product is specified. That means calibrated readings, substrate evaluation, and a coating system chosen for the actual conditions in your bathroom, not a generic spec pulled from a price list.

The team is fully in-house, no subcontractors, which means the same people who assess the problem apply the fix. For homeowners in Cape Town, the Cape Winelands, and the Overberg dealing with recurring damp, peeling ceilings, or paint that fails within a year of application, this prep-first process is what separates a repair that lasts from one that needs redoing.
Get a quote from Cape Apex Painters and have a professional assess your bathroom before the next coat goes on.
For More Information on Painting in Stellenbosch, Head Over to the Following Sites
The following resources provide additional information about painting, surface preparation and professional painting services in Stellenbosch:
- Planning your home improvement project
- Home improvement tips
- Home improvement made easy
- Tips to increase the value of your home
- Great ideas to improve home improvement
- How paint can change your home
- Ideas for home improvement
- Make your house a home
- Make your home a better place
- Home improvement projects
Sources
- Prominent Paints (industry repair guideline)
- Sherwin-Williams: How to fix paint flaking
- This Old House: How to paint a mold-resistant bathroom
- Rapidrepair